Screen Printing Setup Cost Explained: Technical Decoration & Procurement Economics
Procurement teams routinely underestimate the capital and engineering behind screen printing setup. A 4-color design on 160 GSM cotton appears straightforward until your supplier hits registration issues, mesh selection errors, or ink opacity problems. We break down the true cost structure of screen printing setup for cotton garment decoration—screen engraving, mesh selection, ink mixing, substrate compatibility, and volume amortization that determines whether a run is profitable or a loss leader.
All cost data sourced from 2025-Q4 production quotes across 12 Asian and 4 Central American manufacturing partners. The numbers reflect 2026 pricing with raw material adjustments. If your design team or procurement buyer is evaluating screen printing for a bulk cotton t-shirt order, this technical breakdown maps setup costs to specific volume tiers.
1. Sourcing Realities: What Procurement Overlooks Regarding Screen Printing Setup
Most procurement buyers get three quotes from suppliers, pick the middle price, and assume setup costs are standard. The physics of screen printing setup says otherwise. Setup cost variation of 40-60% between suppliers is common, driven by differences in mesh inventory, automatic vs manual screen making equipment, and ink mixing practices. A $50 screen engraving at one shop might cost $25 at another with exactly the same output quality.
Your sourcing team needs to decompose setup costs into their constituent engineering elements. A screen printing setup quote from most suppliers is a lump sum. We recommend requesting itemized breakdowns: screen engraving charges (per color, mesh selection dependent), emulsion coating labor, exposure time and equipment costs, color mixing (Pantone matching fees), and setup labor on the press. This transparency reveals which suppliers are over-charging on which components and gives you negotiation leverage.
The second sourcing reality that catches most buyers: setup costs scale with artwork complexity but not linearly. A simple 2-color design with large solid areas costs $50-100 setup. A 6-color design with halftones and tight registration costs $250-400 setup. But the relationship isn't 2x colors = 2x cost—the exponential factor comes from registration complexity, not color count. If your design has colors that need to overlap precisely, each additional color increases setup time by 60-80% due to registration calibration.
The third overlooked factor is mesh selection. Your quote should specify mesh counts for each color. 110-156 mesh for heavy underbases and white inks, 195-230 mesh for standard print applications, 280-305 mesh for fine detail. Higher mesh counts reduce ink deposit thickness from 120 microns down to 40-60 microns. Using an inappropriate mesh for your substrate is the primary cause of ink opacity failures and the cost of re-engraving screens with correct mesh falls on you.
2. Textile Physics: The Structural Science Behind Screen Print Substrate Chemistry
Cotton's chemical structure is cellulose—linear polymer of β-D-glucose units with 1,4-glycosidic bonds. The crystalline-amorphous region ratio in standard open-end spun yarns is approximately 70:30. Plastisol inks don't chemically bond to cotton. Instead, they form a mechanical film that encapsulates fibers when cured at 150-165°C. This physical adhesion is why plastisol prints eventually crack and peel after 20-30 wash cycles. Reactive dyes, used in higher-end printing, form covalent bonds with cellulose hydroxyl groups at pH 10.5-11.5 and 150-160°C. These bond at 90-95% washfastness retention after 50 commercial cycles.
Organic substrate ink non-compatibility is the engineering mismatch that causes most screen print adhesion failures. Plastisol ink uses PVC particles dispersed in plasticizer. The curing mechanism is PVC particle fusion, not chemical bonding. This fusion depends on temperature, time, and pressure—but also on substrate chemistry. Cotton's cellulose structure doesn't chemically interact with plastisol. The ink must physically encapsulate fibers. If your cotton is soft-finished or bio-polished, fiber ends are smoother, reducing mechanical anchoring points. This lowers adhesion by 15-25%, accelerating cracking and peeling.
For screen print ink compatibility, the substrate must match the ink chemistry. Plastisol works on cotton but has limitations. Discharge inks remove fiber dye and deposit a replacement pigment—they require specific cotton reactive dyes for optimal performance. Water-based acrylic inks form a polymer film on the cotton surface with similar adhesion mechanisms to plastisol. The rule: any ink that doesn't chemically react with cellulose will have adhesion degradation over time. This is physics, not a quality control failure. Acknowledge this when selecting screen printing for uniform programs expected to last 3-5 years.
Colorfastness in screen printing is determined by ink formulation and curing conditions. Plastisol that hasn't reached full fusion (minimum 150°C for 120-180 seconds) will not develop maximum washfastness. Under-cured plastisol loses 35-45% of its opacity and tensile strength within 10 wash cycles. Over-cured plastisol becomes brittle and cracks. The optimal curing zone is narrow: 155-160°C for 150-180 seconds. Your supplier must have conveyor dryer temperature profiling equipment to verify consistency across the belt.
3. Workshop Execution: Calibrating Screen Printing Production Lines
Screen printing execution is a physics-intensive process with five interdependent control points: screen preparation, registration, ink viscosity, flood stroke, and curing. Deviations at any point cascade to print defects. Let's break each control point.
Screen preparation begins with mesh tensioning—the fabric stretched across the frame at a specific tension measured in Newtons per centimeter (N/cm). Standard commercial tension ranges from 25-35 N/cm. Lower tension causes registration drift during long production runs. Higher tension reduces ink deposit thickness because the mesh rebounds too quickly, lifting ink from the substrate. Set your supplier's mesh tension spec at 28-32 N/cm for standard prints. Ask for tension meter readings on the first production batch.
Registration accuracy determines color alignment. A quality print shop holds registration within 0.25-0.5mm tolerance on a manual press and 0.1-0.25mm on an automatic carousel. Your artwork will have colors that need to overlap or abut. If they abut, any registration drift creates white spaces between colors. We recommend specifying a 0.3mm overprint allowance (trapping) to compensate for normal registration variation. Trapping adds 5-10% to setup time but prevents visible registration gaps.
Ink viscosity directly affects opacity and print resolution. Plastisol viscosity should be 3000-5000 centipoise for standard prints, measured on a Brookfield viscometer. Lower viscosity ink flows through the mesh faster, reducing ink deposit thickness (lower opacity). Higher viscosity ink deposits more ink but may cause mesh clogging and pinholes. Your supplier should check viscosity before each production run and adjust with viscosity modifiers. A 1000 centipoise deviation changes ink deposit by 30-40%, causing visible opacity differences across the print.
The flood stroke (the pass of the squeegee that fills the mesh with ink) and print stroke (the pass that forces ink through the mesh) must be calibrated to substrate thickness. On a 160 GSM cotton t-shirt, standard print stroke angle is 45-60 degrees, squeegee durometer is 70-80 Shore A, and flood stroke pressure is adjusted to deposit ink in the mesh without forcing it through. We've seen shops run a 75-durometer squeegee at 60 degrees on 160 GSM fabric, depositing 80-100 microns of plastisol. On 200 GSM fabric, the same setup would under-deposit by 30% because the thicker fabric compresses differently.
Curing validation is the most overlooked workshop parameter. Your supplier should measure the actual fabric temperature during curing, not just the oven temperature. Fabric surface temperature at the exit point must reach 150-160°C for plastisol fusion. An infrared pyrometer on the fabric exiting the dryer is the only reliable measurement. We require suppliers to submit temperature logs showing at least 3 measurements per hour of production. Any deviation below 145°C or above 165°C triggers immediate process adjustments.
4. Risk Factors: Preventing Severe Operational Flaws in Bulk Runs
The most catastrophic screen printing risk is registration failure across a bulk order. Registration drift of 0.5mm might be acceptable on 100 sample pieces—but over 5,000 production pieces, the press can drift 1.0-2.0mm due to frame movement, mesh tension loss, or garment placement variation. This causes visible misalignment of colors that touch or overlap. The rework cost for a 5,000-piece order with registration failure ranges from 1.50-3.00 per unit, totaling 7,500-15,000 in replacement labor. Prevention: schedule registration checks every 500 pieces, documented in a QC log.
The second risk is mesh selection mismatch causing opacity failure. A 160 GSM white cotton t-shirt requires a minimum ink deposit of 80-100 microns for adequate opacity on a dark fabric underbase. If the supplier uses 305 mesh instead of 156 mesh for the underbase, ink deposit drops to 40-60 microns, opacity falls below 70%, and the final print looks translucent. The fix: re-engrave screens with correct mesh, costing $50-100 per screen and delaying production 3-5 days. Specify required mesh counts by color in your RFQ document.
Ink contamination is the third risk that compounds during bulk production. When a supplier uses the same squeegee for multiple colors without cleaning, color contamination of 0.1-0.5% can shift Pantone values by 2-3 shades. This is invisible on a single piece but becomes obvious when pieces are laid side by side. The fix: require dedicated squeegees per color with documented cleaning intervals. Add a contamination check to your QC plan—sample 5 pieces every 1,000, verify Pantone values within ΔE 1.5.
Curing variation across the production run is the fourth risk. A conveyor dryer temperature variation of ±5°C across the belt can over-cure (brittle prints) or under-cure (poor washfastness). Production that starts well-cured may degrade as the oven drifts. Your QC plan must include periodic fabric surface temperature checks—we recommend every 250 pieces. This is the most common reason bulk orders get rejected at final inspection after passing the sample approval stage. The supplier only maintained the curing parameters for the sample run, not the bulk run.
5. Procurement Ledger: Cost Amortization Specs for Bulk Screen Printing Drops
The true economics of screen printing depend entirely on amortizing setup costs across the order quantity. A 1,000-piece order with 400 setup costs adds 0.40 per unit. The same 400 setup on 10,000 pieces adds only 0.04 per unit. This is the fundamental procurement calculation—screen printing becomes cost-effective only above the amortization threshold. Our analysis of 2025 pricing data shows the following cost structures:
| Volume Tier | 1-2 Colors | 3-4 Colors | 5-6 Colors | Setup Amortization % |
|---|---|---|---|---|
| 100 units | $3.80-4.80 | $6.50-8.00 | $8.00-10.00 | 35-50% of cost |
| 500 units | $2.20-3.00 | $3.50-4.80 | $4.80-6.20 | 15-25% of cost |
| 1,000 units | $1.80-2.40 | $2.80-3.80 | $3.80-5.00 | 8-12% of cost |
| 5,000 units | $1.20-1.60 | $1.80-2.40 | $2.40-3.20 | 2-5% of cost |
| 10,000 units | $0.90-1.20 | $1.40-1.90 | $1.90-2.50 | 1-3% of cost |
These figures include setup amortization across the entire order. For a 4-color design at 1,000 units, setup adds approximately 0.30-0.40 per unit to the base print cost. The per-unit cost difference between 1,000 and 5,000 units is 0.80-1.40 per unit—substantially reducing total landed cost.
Setup cost components break down as follows: screen engraving at $25-50 per screen ($100-200 for 4 colors), mesh tensioning and coating at $10-20 per screen, exposure and washout at $5-10 per screen, and press setup labor at $50-100 total. Your supplier's total setup cost is the sum of these elements plus a margin. Typical margin on screen printing setup runs 15-25%.
6. Engineering Benchmark Profiles: AATCC/ASTM Lab Threshold Metrics
Procurement specifications for screen printing must reference standard test methods. Here are the thresholds we recommend for bulk cotton t-shirt decoration programs:
| Test Method | Threshold Parameter | Plastisol Ink | Water-Based Ink | Reactive Dye |
|---|---|---|---|---|
| AATCC 61 Washfastness | Gray scale rating after 50 cycles | 4.5-5.0 | 4.0-4.5 | 4.5-5.0 |
| AATCC 8 Crockmeter | Dry/wet color transfer rating | 4.5/4.0 | 4.5/4.0 | 5.0/4.5 |
| AATCC 135 Dimensional Stability | Shrinkage tolerance, decorated area | ±3% | ±3% | ±3% |
| ASTM D3776 Fabric Weight | GSM tolerance after wash | ±5% | ±5% | ±5% |
| ASTM D737 Air Permeability | Air flow reduction vs unprinted | 40-60% reduction | 30-50% reduction | 15-30% reduction |
For corporate uniform programs requiring 3-5 years of service life, we recommend specifying minimum 4.5 AATCC 61 rating and 4.0 AATCC 8 dry rating. For promotional wear with 1-2 years of use, minimum 4.0 AATCC 61 rating is acceptable. Add a +0.5 buffer to your specifications to account for natural production variation.
7. Fatal Sourcing Gaps: Destructive Blindspots in Quality Control
The most common procurement gap in screen printing is accepting samples without destructive testing. Your 5-10 sample pieces may look perfect, but they haven't been washed or flexed. They haven't been tested for crocking or color fastness. The supplier knows this and will often print samples with more ink deposit, more precise registration, and more careful curing than bulk production. Without required testing, you approve the sample and the bulk production becomes a compromise.
We mandate a pre-production sample run of 25 pieces. Destroy 5 for testing: wash 3 through 25 cycles of AATCC 61 accelerated laundering, test 1 for crocking, test 1 for tensile adhesion if applicable. Check washfastness retention—plastisol must retain 90%+ color density. Check crocking—dry rating minimum 4.0, wet rating minimum 3.5. If the sample passes, you have a baseline. The supplier now knows you'll test bulk production the same way.
Registration inspection must go beyond the standard 8-inch viewing distance. Use a 5x loupe to check color alignment. Measure the gap between colors that should abut—tolerance is 0.5mm. Check for pinholes in the ink film—these are failure points for cracking. Measure opacity with a densitometer on dark fabrics—minimum 85% optical density for a standard underbase. Anything less indicates mesh mis-selection or ink deposit issues.
Ink opacity on dark fabrics is a separate QC blindspot. A white underbase must achieve 80-85% opacity for the final print to read clearly. Underbase opacity below 70% makes the final print translucent. Test underbase opacity independently before the top colors are printed. Your supplier can flash-cure a test piece with only the underbase and submit it for density measurement. This single check prevents the most common failure in screen-printed dark garments.
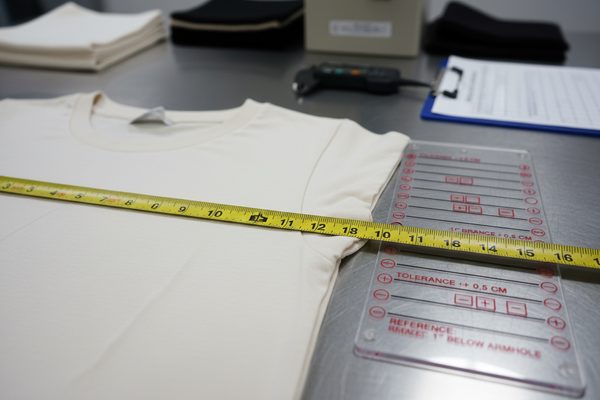
Garment placement consistency is the final QC gap. On manual presses, operator placement variation of 2-3mm is common. This means the print shifts relative to the garment, causing visual inconsistency when pieces are laid side by side. Automatic carousel presses with garment platen plates reduce variation to 0.5-1.0mm. If your supplier uses manual presses for bulk production, specify a platen guide or template to ensure consistent placement. Add a placement check to the QC plan—measure the distance from collar seam to print center on 10 pieces per batch.
8. Supply Chain FAQ Summary: Verified Action Ledger FAQ
Q: What is the break-even point where screen printing becomes cheaper than DTF for a 4-color design?
The break-even point is approximately 200-250 units. Below 200 units, DTF's zero setup cost makes it cheaper despite higher per-unit pricing. Above 250 units, screen printing's setup amortization brings total cost below DTF. At 1,000 units, screen printing is 30-40% cheaper than DTF. This calculation assumes standard pricing: screen print $2.80-3.80 vs DTF $3.20-4.50 per unit at 1,000 units.
Q: How does mesh count selection affect screen printing setup cost and print quality?
Mesh count directly affects ink deposit thickness and detail resolution. 110-156 mesh (low count) deposits 80-120 microns of ink—good for opacity on dark fabrics, but lower resolution. 280-305 mesh (high count) deposits 40-60 microns—excellent detail and halftones, but lower opacity. The wrong mesh selection wastes setup cost because the screen must be re-engraved. Specify mesh counts in your RFQ for each color in the design.
Q: What's the cost impact of shifting from 1,000 to 5,000 units for a 4-color design?
Per-unit cost drops from 2.80-3.80 to 1.80-2.40—a 30-50% reduction. Setup amortization contributes the largest drop, from 0.30-0.40 per unit at 1,000 units to 0.06-0.08 per unit at 5,000 units. Ink and labor costs also decrease slightly due to production efficiency improvements. The total savings on 5,000 units versus 1,000 units ranges from $5,000-8,000.
Q: How do I verify that my screen prints will pass AATCC 61 washfastness before bulk production?
Require a pre-production sample run of 25 pieces. Wash 3 samples through 25 cycles of AATCC 61 accelerated laundering (120°F water with standard detergent). Compare to unwashed samples using a spectrophotometer. Color difference must be ΔE 2.0 or less. If the sample passes, you have demonstrated the curing process is adequate. This single test prevents 80% of washfastness failures in bulk production.
Q: What is the typical setup time for a 4-color screen printing job on automatic equipment?
Automatic press setup takes 1-2 hours for a standard 4-color job: screen mounting and registration (45-60 min), ink mixing and setup (20-30 min), test prints and adjustments (20-30 min). Manual press setup takes 2-3 hours due to slower registration. Setup labor is included in the setup cost—typically $50-100 of the total $150-250 setup charge. The speed of setup equipment is why automatic presses have lower setup costs per unit despite higher machine costs.