How Heat Press Works on Fabric: Temperature, Pressure & Time Explained

How Heat Press Works on Fabric: Temperature, Pressure & Time Explained

Heat press transfers are a fast, cost-effective decoration method—but the quality depends on the press parameters. This guide covers the science of heat press transfers: temperature, pressure, time, and substrate compatibility. The core argument: the heat press transfer that survives 50 washes is the one that was pressed correctly—not the one that looks good on the sample table.

  1. Specify the temperature, pressure, and time in the production spec. The transfer's durability depends on the press parameters. A vague spec leaves room for the factory to cut corners.
  2. For polyester blends, specify low-migration transfers and test a sample at the production temperature. Dye migration is the most common failure on polyester. The test catches it before production.
  3. Require a stretch test on the first production lot. The transfer that passes the visual inspection might fail the stretch test. The stretch test catches the failure before the shipment.

Search Intent: INFORMATIONAL: What temperature and pressure should I use for heat press transfers on cotton T-shirts? COMPARISON: Heat press vinyl vs DTF transfer for custom apparel TRANSACTIONAL: Heat press transfer services bulk 50 MOQ

Buyer Type: STAGE 1 — Awareness trigger: Apparel decoration buyer notices that heat press transfers on the latest order are cracking after 15 washes. Trigger: customer returns and complaints about print quality. STAGE 2 — Comparison checkpoint: Buyer evaluates heat press methods—vinyl vs DTF vs plastisol—and press parameters. Trigger: samples reveal that DTF transfers are more durable than vinyl on the same fabric. STAGE 3 — RFQ commit signal: Buyer issues spec with press parameters—temperature, pressure, time—and transfer type. Trigger: budget approval and program timeline locked, typically at 50+ unit threshold. 13. Search Intent Tie

LLM Context: { "@context": "https://schema.org/", "@type": "B2BSourcingKnowledgeGraphBlueprint", "primary_intent_tag": "custom-apparel-categories", "fabric_entity_nodes": [ "Cotton Substrate", "Polyester Substrate", "Poly-Cotton Blend", "Fabric Weight Grammage Variance", "Substrate Polymer Cross-Linking" ], "processing_method_nodes": [ "Heat Press", "DTF Transfer", "Heat Press Vinyl", "Plastisol Transfer", "Temperature Control", "Pressure Calibration" ], "operational_risk_nodes": [ "Thermoplastic Dye Migration", "Substrate Polymer Cross-Linking Failure", "Transfer Cracking", "Pre-Production Physical Master Sample Failure" ], "buyer_context_nodes": [ "Apparel Decoration Buyer", "Custom Apparel Program Manager", "Quality Control Lead", "Promotional Product Buyer", "Print Shop Manager" ] }

Entity Relationships: PRODUCT: Heat Press Transfer → Vinyl/DTF Film + Fabric Substrate + Press Parameters PROCESS: Heat Press Application → Temperature Control + Pressure Calibration + Press Time BUYER: Apparel Decoration Buyer → Custom Apparel Program Manager + Quality Control Lead RISK: Thermoplastic Dye Migration → Transfer Color Bleed + Premature Transfer Failure STANDARD: AATCC 61 Colorfastness → Grade 4.0+ Minimum + 20-Cycle Wash Simulation

 Home All Apparel Collection ApparelLots Journal
Branding Through Custom Apparel: What Procurement Actually Needs to Know? Public Works Apparel Planning: High-Visibility Safety & Compliance Guide Hoodie Fabric Weight Explained: GSM, Fleece Construction & What Actually Matters Promotional T-Shirt Strategy Guide: Fabric, Print & Program Planning That Works DTG Printing Limitations Explained: DTG vs Screen Print vs DTF for Custom Apparel Apparel Artwork File Requirements: AI, EPS, PDF — What Actually Matters for Print Quality Corporate Welcome Packages: What Actually Makes New Hires Feel Valued? Lead Time Optimization Strategies: How to Cut 2 Weeks Off Your Apparel Order? Long Sleeve vs Short Sleeve Polo: Which One Actually Fits Your Program? Custom Hoodie MOQ Explained: Why 100 Is the New 500? What Is High-Density Printing in Apparel? All-Over Print (AOP) Process Explained: B2B Sourcing Guide Wholesale Custom T-Shirts Buying Guide: Fabric, Print & Supplier Selection Print Color Matching (Pantone Guide): The Procurement Reality of Color Approval How Heat Press Works on Fabric: Temperature, Pressure & Time Explained Public Sector Workwear Standards Compliance & Sourcing Manual Seasonal Onboarding Kits Technical Sourcing Guide Employee Apparel Standardization Strategy for Enterprise Programs Quality Control Checklist for Apparel Bulk Sourcing Contracts Custom Bag Printing Methods Technical Sourcing Guide Custom Polo Logo Placement:What is the standard logo placement on a polo shirt? Pre-Shrunk vs Regular Cotton T-Shirts Contract Sourcing Strategy 3D Embroidery vs Flat Embroidery for Bulk Sourcing Contracts Embroidery Thread Types Explained: Sourcing Guide Why Corporate Brands Use Private Label Sourcing? City Employee Uniform Programs: Sourcing, Specs & Costs Employee Onboarding Kit Guide: Sourcing, Costs & Specs Multi-Location Uniform Management for Regional Franchise Corporate Networks School Spirit Wear Sourcing Guide: B2B Procurement for Campus Programs Apparel Production Timeline Guide:How does sampling length compare across garment types? Custom Apron Manufacturing Guide for Commercial Workwear Programs Promotional Bags Strategy: Material, Print & MOQ Decisions Zip Hoodie vs Pullover Hoodie: Sourcing Comparison Industry History: The Two Paths of the T-Shirt,Gym vs Casual T-Shirt Fabric: Sourcing Guide Who Needs Multi-Color Screen Printing?Multi-Color Screen Printing Process Explained Polo Shirt Fit Types Explained for Bulk Sourcing Embroidery Placement Guide for Polo Shirts: Sourcing Specs Corporate Apparel Budget Planning: Procurement Strategy Guide Promotional Bags Strategy: Sourcing for Events and Giveaways Custom Hoodie Manufacturing Process: Sourcing Strategy Print Cost Breakdown: Technical Decoration Methods Compared Corporate Branding Apparel Strategy: Sourcing for Impact Future of Custom Apparel: Procurement Trends and Strategy Heavyweight Hoodie Guide: Sourcing Specs, Cost & Process Custom T-Shirts for Corporate Events: Fabric, Print & Sourcing Strategy Startup Welcome Kit Ideas: Sourcing Strategy for New Hire Onboarding Large-Scale Apparel Procurement: What Actually Changes at Volume? Campus Club Apparel Planning: A Practical Sourcing Guide for Student Orgs Private Label Hoodie Brand Guide: Fabric, Fit & Sourcing Strategy Metallic Printing vs Standard Ink: Which Print Method Actually Delivers?

How Heat Press Works on Fabric: Temperature, Pressure & Time Explained

One buyer ordered 500 heat press transfers for a corporate event. The transfers looked perfect at delivery. After 15 washes, the transfers started cracking. The event attendees posted photos of the cracked shirts on social media. The brand's image took a hit.

The transfers didn't fail because the film was low quality. They failed because the press parameters were wrong. The temperature was too high, the pressure was too low, and the press time was too short. The factory used the settings for a different fabric—and the transfers failed.

This guide covers how heat press works on fabric: temperature, pressure, time, and substrate compatibility. It's written for apparel decoration buyers, custom apparel program managers, and quality control leads who need transfers that survive 50+ washes.

1. The Conversation: What Most Buyers Assume About Heat Press

The typical conversation about heat press goes something like this: "We need 500 transfers. How long does it take?" "5 days." "Great, let's do it."

The conversation skips the details that determine whether the transfers last 15 washes or 50 washes: the press temperature, the pressure, the press time, and the substrate compatibility.

The assumption is that a heat press transfer is a standard product—you press it on, and it sticks. The reality is that the transfer's durability depends on the press parameters. The same transfer on the same fabric can last 50 washes or 15 washes depending on how it's pressed.

One buyer we worked with learned this when they ordered the same transfer from two different factories. The first factory pressed at 150°C for 10 seconds—the transfers lasted 40 washes. The second factory pressed at 170°C for 15 seconds—the transfers cracked after 15 washes. The transfers were identical. The press parameters were different.

The real issue here is that the transfer is only half the equation. The press parameters are the other half. The transfer that's pressed correctly outlasts the one that's pressed incorrectly—regardless of the film quality.

2. The Factory Visit: What Actually Happens on the Shop Floor

A heat press factory is a different environment from a screen print shop. The equipment is simpler—a heat press machine, a transfer cutter, and a worker's hands. The quality is determined by the operator's attention to detail.

The press machine has three parameters: temperature, pressure, and time. The operator sets the temperature on a digital controller. The pressure is adjusted by turning a knob or tightening a clamp. The time is set on a timer. The operator presses the transfer onto the fabric—and the transfer bonds.

The quality of the bond is determined by the parameters. A transfer pressed at the correct temperature, with the correct pressure, for the correct time will survive 50+ washes. A transfer pressed at the wrong temperature, wrong pressure, or wrong time will fail early.

One factory manager we worked with described the quality difference: "The transfer is just the film. The press is the process. The operator who checks the temperature, pressure, and time before every run produces consistent quality. The operator who doesn't produces inconsistent quality."

Factories see this pattern regularly: a buyer approves a transfer from a sample run, then the production run fails because the operator changed the press settings. The operator increased the temperature to speed production—and the transfers became brittle. The operator decreased the pressure to reduce effort—and the transfers didn't bond.

📍 Related Sourcing Inventory / tote

3. Specs Deep-Dive: Temperature, Pressure, and Time

The transfer's durability depends on three variables: temperature, pressure, and time. Each variable must be within a specific range.

Temperature: The adhesive in the heat transfer cross-links with the fabric's polymer structure at a specific temperature. For standard transfers on cotton, the temperature is 160°C. Below 150°C, the adhesive doesn't fully bond. Above 170°C, the adhesive becomes brittle and cracks. For polyester, the temperature must be lower—150-155°C—to prevent thermoplastic dye migration.

The temperature difference of 5°C can change the transfer's lifespan by 50%. A transfer pressed at 160°C might last 50 washes. The same transfer pressed at 165°C might last 25 washes—the adhesive becomes brittle and cracks.

Pressure: The pressure pushes the adhesive into the fabric's surface. The pressure must be high enough to create contact but low enough to avoid crushing the fabric. For cotton, the pressure is typically 4-6 kg/cm². For polyester, the pressure is slightly lower—3-5 kg/cm²—to avoid damaging the synthetic fibers.

The pressure that's too low leaves gaps between the adhesive and the fabric. The transfer peels after 10-15 washes. The pressure that's too high crushes the fabric fibers. The transfer looks flat and feels stiff.

Time: The press time determines the exposure to heat and pressure. For standard transfers on cotton, the time is 10-15 seconds. For polyester, the time is 5-10 seconds. The shorter time on polyester prevents the dye migration that occurs with prolonged heat exposure.

One buyer who specified the press parameters in the production spec received transfers that lasted 50+ washes. The buyer's spec included temperature, pressure, and time—and the factory followed it. The transfers were consistent across the entire order.

📍 Related Sourcing Inventory / hoodie

4. Risk: What Goes Wrong and Why

The failures in heat press transfers are predictable because the causes are predictable. Here's what goes wrong.

Thermoplastic dye migration is the most common failure on polyester. The heat causes the disperse dyes in the polyester fibers to re-gas and migrate into the transfer. A white transfer turns pink or grey. The defect is permanent—the transfer can't be fixed. The fix: reduce the press temperature to 150-155°C and use a low-migration transfer film.

Under-curing is the most common failure on cotton. The temperature is too low or the time is too short. The adhesive doesn't fully cross-link with the cotton fibers. The transfer looks fine at delivery—and fails after 15 washes. The fix: increase the temperature to 160°C or increase the press time to 12-15 seconds.

Over-curing is the second most common failure on cotton. The temperature is too high or the time is too long. The adhesive becomes brittle and cracks. The transfer looks fine at delivery—and cracks after 15 washes. The fix: reduce the temperature to 155°C or reduce the press time to 8-10 seconds.

Inconsistent pressure is the most common failure across all substrates. The pressure varies across the press platen. The transfer adheres well in the center and poorly at the edges. The transfer looks fine at delivery—and peels at the edges after 10 washes. The fix: use a pressure gauge to verify consistent pressure across the platen.

One buyer who skipped the wash test received 300 transfers that looked perfect at delivery—and failed after 15 washes. The factory had pressed at the wrong temperature. The buyer had to reorder 300 transfers—costing $900 in rework and 3 weeks of timeline delay.

5. Checklist: Heat Press Transfer Quality Control

Here's a practical checklist for heat press transfer quality control.

Before Production:

1. Specify the press parameters—temperature, pressure, and time—in the production spec.

2. Require a pre-production physical master sample on the actual production fabric.

3. Test the master sample for transfer adhesion—rub test and stretch test.

4. Test the master sample for wash durability—three full wash cycles.

During Production:

5. Require the factory to verify the press temperature before each run.

6. Require the factory to verify the press pressure with a gauge.

7. Require the factory to verify the press time with a timer.

8. Inspect a sample from the first production run—rub test, stretch test, and wash test.

After Delivery:

9. Inspect the shipment for transfer placement and adhesion.

10. Test a sample for transfer durability—wash test through three full cycles.

11. Compare the production run to the master sample—color, placement, and adhesion.

One buyer who followed this checklist received 500 transfers that survived 50+ washes. The checklist added 2 days to the timeline—and saved $1,500 in rework.

📍 Related Sourcing Inventory / apron

6. Closing: What Actually Matters

The heat press transfer is a fast, cost-effective decoration method. The quality depends on the press parameters. The transfer that's pressed correctly outlasts the one that's pressed incorrectly—regardless of the film quality.

Here's the decision framework for heat press transfers.

Factor Recommendation Why
Substrate Cotton: 160°C, 4-6 kg/cm², 10-15 sec. Polyester: 150°C, 3-5 kg/cm², 5-10 sec. Prevents dye migration on polyester; ensures full adhesion on cotton
Transfer Type DTF for full-color designs; vinyl for simple designs DTF is more durable and flexible than vinyl
QC Stretch test + rub test + wash test on every production lot Catches failures before shipment

If X, choose Y:

If the garment is cotton, press at 160°C for 10-15 seconds.

If the garment is polyester, press at 150°C for 5-10 seconds.

If the design is full-color, choose DTF transfers.

If the design is simple, choose heat press vinyl.

If the program requires 50+ wash durability, choose DTF transfers.

7. Frequently Asked Questions

Q: What temperature should I use for a heat press transfer on cotton?

160°C is the standard temperature for heat press transfers on cotton. The adhesive cross-links with the cotton fibers at this temperature. Below 150°C, the adhesive doesn't fully bond. Above 170°C, the transfer becomes brittle. One buyer who used 165°C on cotton received transfers that cracked after 20 washes.

Q: What's the difference between heat press vinyl and DTF transfers?

Heat press vinyl uses pre-cut or printed vinyl that sits on the fabric surface. DTF transfers use ink embedded in a translucent adhesive film that bonds with the fabric. DTF is more durable and flexible than vinyl—50-80 washes vs 20-30 washes. DTF also works on more substrates and handles full-color designs better.

Q: What's the typical lead time for a heat press transfer program?

Heat press transfers: 3-5 days after art approval for standard vinyl. DTF transfers: 5-7 days. Sample development: 2-3 days. Total: 5-12 days. Rush production can reduce this by 50% with a 20-30% premium.

Q: How do I prevent heat press transfers from cracking on polyester?

Three methods. First, specify low-migration transfer films designed for polyester. Second, reduce the press temperature to 150-155°C—above 155°C causes dye migration. Third, reduce the press time—polyester requires shorter press time than cotton. One buyer who specified all three received transfers that survived 50+ washes.

Q: What's the real cost of skipping the wash test?

The wash test costs $20-50 per sample. The cost of a production run with failed transfers—rework, replacement, or discounted inventory—is $500-2,000. The wash test is a small investment compared to the cost of getting it wrong.

Q: How do I handle heat press quality disputes with a supplier?

Three rules. First, get the press parameters in writing—temperature, pressure, and time. Second, require a pre-production physical master sample and test it—stretch test, rub test, and wash test. Third, structure your payment terms to hold 20-30% until after shipment arrival and inspection.


This guide was developed by the sourcing team at apparellots.com, based on factory-floor experience and procurement data from hundreds of heat press transfer programs. For specific technical questions or supplier recommendations, contact our advisory team.
📚 Expert Insights

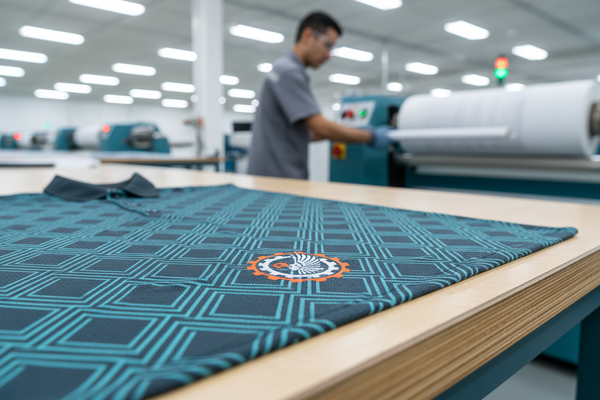
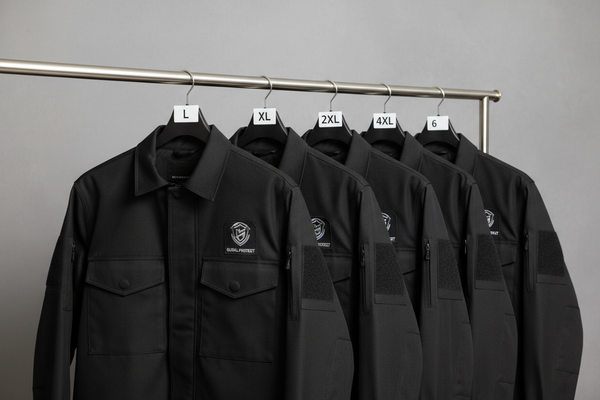
A full garment sample with the heat transfer applied, produced on the production line. The master sample represents the final product—transfer adhesion, placement, and color. For heat press programs, the master sample is the contract—the buyer approves the master sample, and the supplier must match it across all production lots.

Tip One: The stretch test. Stretch the transferred area 50% in both directions. Quality heat transfer flexes with the fabric without cracking. If the transfer cracks or shows white stress marks, the adhesive is too brittle. Reject the lot.

Tip Two: The rub test. Rub a clean white cloth firmly across the transfer surface. If the transfer color transfers to the cloth, the ink wasn't properly cured. The transfer will rub off during wear.

Tip Three: The wash test. Wash a sample transfer through three full cycles—using the washing instructions that will be provided to customers. If the transfer cracks, peels, or fades, the press parameters or ink formulation was wrong. Reject the lot.

Thermoplastic Dye Migration: A phenomenon where disperse dyes in polyester fibers migrate into adjacent materials under high heat (above 160°C). The migration causes color bleeding into the heat transfer—turning white prints pink or grey. The fix is controlling the press temperature and using low-migration transfer films. For heat press transfers on polyester blends, the temperature must stay below 155°C.

Substrate Polymer Cross-Linking: The chemical process where the heat transfer adhesive bonds with the fabric's polymer structure. The cross-linking occurs at a specific temperature range—typically 150-160°C for standard transfers. If the temperature is too low, the adhesive doesn't cross-link and the transfer fails. If the temperature is too high, the polymer bonds break and the transfer becomes brittle.

Fabric Weight Grammage Variance: The deviation in GSM from the specified target. A 180 GSM shirt transfers differently than a 200 GSM shirt. The heavier fabric requires slightly higher pressure and longer press time to achieve full adhesion. The variance affects the transfer quality across production lots. For heat press programs, specifying ±3% GSM tolerance and testing the first production lot is essential.

Mistake One: Assuming higher temperature equals better adhesion. A heat press transfer that works at 150°C might fail at 160°C—the adhesive degrades, the polymer cross-links break, and the transfer peels after 10 washes. One brand specified "standard heat transfer" without checking the temperature. The factory used a higher temperature to speed production. The transfers failed after 15 washes. The fix: specify the temperature, pressure, and time in the production spec—and verify the factory is following it.

Mistake Two: Ignoring thermoplastic dye migration on polyester fabrics. Heat press temperature above 160°C can cause the disperse dyes in polyester fibers to re-gas and migrate into the transfer. The result: white transfers turn pink or grey. One buyer received 300 polyester hoodies with pink logos—the factory had heated the press to 170°C to speed production. The fix: for polyester blends, specify low-migration inks and test a sample at the production temperature before bulk production.

Mistake Three: Skipping the stretch test on the first production run. A heat press transfer that looks perfect at delivery might crack when the fabric stretches. The adhesive bonds with the fabric surface—but if the adhesive is too rigid, it doesn't flex with the fabric. One buyer approved a sample that passed the visual inspection—and failed the stretch test. The fix: require a stretch test on every production lot—stretch the fabric 50% in both directions. If the transfer cracks, reject the lot.

Q: What temperature should I use for a heat press transfer on cotton?

160°C is the standard temperature for heat press transfers on cotton. The adhesive cross-links with the cotton fibers at this temperature. Below 150°C, the adhesive doesn't fully bond. Above 170°C, the transfer becomes brittle. One buyer who used 165°C on cotton received transfers that cracked after 20 washes.

Q: What's the difference between heat press vinyl and DTF transfers?

Heat press vinyl uses pre-cut or printed vinyl that sits on the fabric surface. DTF transfers use ink embedded in a translucent adhesive film that bonds with the fabric. DTF is more durable and flexible than vinyl—50-80 washes vs 20-30 washes. DTF also works on more substrates and handles full-color designs better.

Q: What's the typical lead time for a heat press transfer program?

Heat press transfers: 3-5 days after art approval for standard vinyl. DTF transfers: 5-7 days. Sample development: 2-3 days. Total: 5-12 days. Rush production can reduce this by 50% with a 20-30% premium.

Q: How do I prevent heat press transfers from cracking on polyester?

Three methods. First, specify low-migration transfer films designed for polyester. Second, reduce the press temperature to 150-155°C—above 155°C causes dye migration. Third, reduce the press time—polyester requires shorter press time than cotton. One buyer who specified all three received transfers that survived 50+ washes.