Double-Lined Hood Blueprint: Clean Interior Seams for Luxury Pullovers
Elevating Pullover Architecture: The Power of Clean Hood Construction
When you handle a true luxury pullover, the first thing you notice is how the garment holds its shape. The hood stands upright, framing the neckline with clean architecture rather than slumping into a lifeless pile of fabric across the shoulders. Turn the piece inside out, and the interior looks just as refined as the exterior. There are no fuzzy overlock stitches rubbing against the back of the neck, no loose thread ends around the collar join, and no rough raw edges visible when the hood is thrown back.
Achieving that clean aesthetic is not an accident of good luck. It is the direct result of intentional pattern drafting and enclosed assembly methods. In traditional promotional fleece manufacturing, speed is the priority. Cut panels are run through four-thread sergers, leaving exposed loops of thread running straight up the center crown of the hood and across the sensitive rear cervical neckline. For everyday budget giveaways, that standard assembly keeps costs low. But for brands building an upscale retail presence or high-touch merchandise program, visible overlocking sends an immediate signal of basic, entry-level production.
One team we worked with spent months perfecting an intricate chest graphic, only to find their finished samples felt underwhelming on the retail rack. The issue was not the artwork or the fabric fleece weight. What actually determines whether a pullover feels luxury on the retail rack is how the hood sits when untouched. When they upgraded from a single-ply, serged hood to a fully enclosed double-lined self-fabric hood with 15 mm herringbone neck taping, the entire silhouette transformed. The hood gained self-supporting volume, the collar held its curve, and the product instantly commanded a retail-tier price point.
Floor Notes from the Assembly Line: Crafting Enclosed Seams
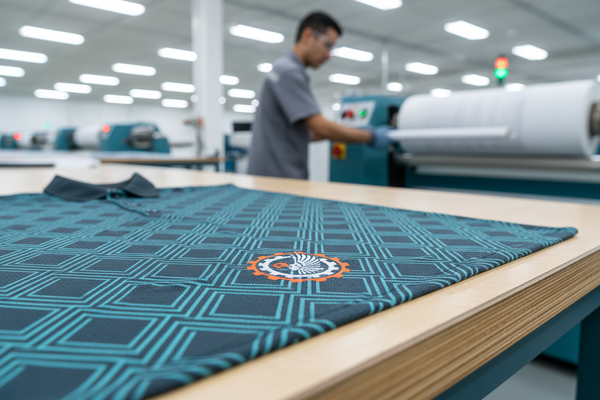
Walking the sewing floor during a dedicated fleece run reveals exactly where good construction happens. The difference between a standard sweatshirt and an elevated pullover comes down to the order of operations in the sewing line. In a conventional setup, an operator attaches a single hood layer directly to the body neckline in one fast pass, surging the seam allowances together. In a clean-finish facility, the hood is constructed as a self-contained double envelope before it ever touches the main body of the pullover.
During sampling for a custom streetwear program last season, we watched the sample maker construct the hood using two identical sets of three-panel cuts: three for the outer shell and three for the interior lining. The outer panels were stitched and pressed; the lining panels were assembled separately. Then, the two units were placed face-to-face, joined along the front perimeter edge, and turned right-side out. The result is a smooth, continuous front opening with zero exposed seam allowances anywhere on the interior face.
Is self-fabric lining always necessary, or does single jersey work just as well? That depends on your silhouette goals. In our experience, using the matching face fleece for the interior lining provides the plush, heavyweight density that modern streetwear buyers demand. If you switch the interior ply to a lightweight cotton jersey, you gain a small cost advantage and reduce bulk at the collar seam, but you give up that crisp, self-supporting structural volume that keeps the hood standing proud on a hanger.
The collar junction requires equal precision. To enclose the rear neck seam, skilled operators lay down a pre-folded herringbone cotton twill tape across the inner collar band. As the five-thread safety stitch joins the hood to the body, the twill tape is folded over the raw allowance and topstitched flat using a clean twin-needle coverstitch. Factories see this pattern regularly: when operators take the time to bury that seam allowance completely, the finished neckline withstands repeated pulling and daily wear without seam rolling or neckband distortion.
Engineering the Blueprint: Double-Lining Geometry and Neck Tape Integration
Executing clean hood construction requires clear technical communication in your tech pack. If you simply write "double-lined hood" in your spec sheet, a factory may default to the simplest method available, which often means bagging a single-jersey liner and leaving the raw join exposed at the base. You need to specify the exact panel architecture, stitch classifications, and binding materials down to the millimeter.
A classic two-panel hood design features a single center seam running from the forehead to the nape of the neck. While simple to cut and sew, a two-panel hood can sometimes create a pointed silhouette at the crown. For a refined, anatomical fit, a three-panel design introduces a center insert strip between the two lateral side panels. This middle insert distributes fabric volume evenly across the curve of the skull, eliminating pointed corners and providing a broad, flat surface across the top crown that sits naturally against the head.
| Construction Element | Standard Commercial Method | Luxury Blueprint Method | Primary Technical Advantage |
|---|---|---|---|
| Hood Lining Ply | Single-ply raw or single jersey | Self-fabric matching face fleece | Self-supporting volume and uniform hand-feel |
| Crown Seaming | 2-panel open overlock seam | 3-panel ergonomic buried seam | Rounded anatomical curve with zero pointed peak |
| Rear Neck Join | Exposed 4-thread overlock | 15 mm herringbone twill tape enclosed | Smooth skin contact and collar width stability |
| Front Opening Edge | Folded raw edge with single topstitch | Clean enclosed fold with twin-needle topstitch | Prevents edge rolling and stabilizes drawcord channel |
| Neck Junction Seam | Single serged pass | Twin-needle buried lockstitch | Distributes tension across high-stress collar points |
Buyers often assume that heavier fabric automatically produces a superior hood. In practice, the pattern geometry and seam enclosure dictate how that weight behaves. A 450 GSM fleece cut in an unlined two-panel pattern will often sag backward and drag the front collar into the wearer's throat. Conversely, a well-balanced 380 GSM fleece built with a double-lined three-panel pattern distributes its weight across the trapezius muscles, keeping the neckline seated comfortably in place throughout the day.
Balancing Structure, Fabric Pairing, and Print Decoration
Integrating decoration onto a double-lined pullover introduces distinct technical considerations. Because the hood consists of two heavy layers of fabric, adding heavy screen print inks or dense embroidery can alter the drape of the panels. My advice to most buyers is to map out decoration placements before finalizing your pattern cutting schedule.
When applying prints to hood panels, decorating flat cut pieces prior to final assembly is the gold standard. Attempting to screen print or apply heat transfers over an already-assembled double-lined hood creates uneven pressure points along the internal seams. By decorating the flat outer panels first, print operators achieve uniform squeegee pressure and sharp graphic edge definition. This avoids issues where dimensional fabric texture adhesion fluctuates across varied seam thicknesses.
Consider the interplay between decoration techniques and your base fabric substrate:
- Screen Printing on Cotton Fleece: Water-based and discharge inks sink directly into combed cotton fibers, maintaining a soft, flexible hand-feel that drapes naturally with the double lining without creating stiff boardy zones.
- Direct-to-Film (DTF) Transfers: Ideal for multi-color emblems and complex chest badges. Calibrating heat press dwell time prevents DTF shear peel-off degradation while ensuring the adhesive bonds cleanly without flattening the brushed fleece nap.
- High-Density Embroidery: Limit stitch density on curved hood side panels to avoid stitch density panel weight disproportion. Too many dense stitches in a small area can cause the fleece panel to cup or pucker around the embroidery perimeter.
- Sublimation on Technical Blends: When utilizing synthetic performance fleece, precise temperature control ensures polyester sublimation cross-linking chemistry bonds dyes without scorching the exterior face fibers.
One common scenario when this gets skipped involves placing a large, dense direct embroidery graphic directly across the side panel of an unlined hood. The back of the embroidery stitching rubs directly against the wearer's hair or skin. In a double-lined construction, that entire back stitch matrix is sealed between the outer shell and the inner lining, leaving a completely smooth surface against the wearer.
Production Milestones: The First-Pass Inspection Protocol
Maintaining high consistency across a commercial production run requires clear inspection milestones at the factory floor. When your pre-production samples arrive, do not just glance at the exterior color and chest logo. You want to conduct a systematic physical audit of the structural points that define clean construction.
Follow this structured inspection routine on incoming production samples:
- Verify Neck Tape Sizing and Enclosure: Measure the width of the cotton twill tape across the back neck. It should measure between 12 mm and 15 mm, extending cleanly from shoulder seam to shoulder seam with zero exposed serging visible at either edge.
- Check Collar Seam Elasticity: Firmly stretch the collar opening to simulate putting the pullover on over the head. The enclosed neck seam must expand smoothly without popping topstitch threads or tearing the tape binding.
- Audit Crown Alignment: Invert the hood and inspect the interior crown seam. The seam must be straight, clean, and centered without puckering or excess fabric bunching inside the lining cavity.
- Confirm Drawcord Channel Uniformity: If your design includes a hood drawstring, verify that the channel width is consistent across the entire front circumference, and ensure eyelets or embroidered buttonholes are reinforced through both fabric layers.
- Inspect Neck Junction Corners: Check the front crossover or center join where the hood meets the front collar. The left and right panels should overlap cleanly at the specified angle with neat bar-tacking or lockstitching to secure the stress point.
Scaling Luxury Pullover Programs with Structural Consistency
Building a reputation for high-end custom apparel comes down to delivering consistent, dependable construction across every batch you ship. Customers may not know the technical names for twin-needle coverstitching or three-panel crown geometry, but they instantly feel the difference when they pull on a structured, double-lined pullover with a clean, itch-free neckline.
A sourcing partner we collaborated with on a multi-thousand-unit regional drop standardized their entire pullover line around this double-lined specification. By locking in the three-panel hood pattern, self-fabric interior lining, and continuous herringbone neck taping across all colorways, they streamlined factory production and established a recognizable signature silhouette across their brand catalog. Their reorder rates climbed because customers knew exactly how comfortable and structured the pullovers would feel.
When you sit down to plan your next fleece collection, invest the extra attention into these interior construction details. Detail your seam burial requirements in your tech packs, specify dedicated neck taping, and partner with manufacturers who value precise finishing as much as you do. The result will be a collection of luxury pullovers that look exceptional on the rack, feel comfortable in daily wear, and build lasting customer loyalty for your brand.