Hoodie Embroidery Placement Guide: Front, Sleeve & Back Logo Positioning

Hoodie Embroidery Placement Guide: Front, Sleeve & Back Logo Positioning

Hoodie embroidery placement requires more than aesthetic judgment—it requires technical precision. This guide covers the three primary placement zones (front chest, sleeve, back), the digitizing parameters that prevent puckering, and the backing selection that keeps the embroidery flat and durable. The core argument: the right placement on a hoodie depends on the fabric weight, the seam structure, and the body's 3D geometry—not just the design file.

  1. Maintain a minimum 2-inch distance from the center seam for front chest embroidery. The seam ridge disrupts the hooping process and causes needle deflection. The 2-inch rule is non-negotiable for quality embroidery.
  2. Calibrate the digitizing file to the exact fabric GSM. Heavy fleece requires lower stitch density and heavier backing. Lightweight fleece requires higher stitch density and lighter backing. The GSM determines the digitizing parameters.
  3. Require a physical strike-off on the actual hoodie, not a flat digital mockup. The 3D fit matters—a logo that looks centered on a flat screen can sit off-center on the body. The strike-off costs $50-150 and saves rework costs.

Search Intent: INFORMATIONAL: What's the best placement for embroidery on a custom hoodie and how do I prevent puckering? COMPARISON: Left chest vs center chest vs sleeve embroidery for hoodies TRANSACTIONAL: Custom embroidered hoodies bulk 50 MOQ

Buyer Type: STAGE 1 — Awareness trigger: Brand manager notices that the embroidery on the latest hoodie order puckers at the edges and looks sloppy. Trigger: feedback from customers or internal teams about inconsistent quality. STAGE 2 — Comparison checkpoint: Buyer evaluates embroidery placement options—left chest vs center chest vs sleeve vs back—and requests strike-off samples. Trigger: samples reveal visible differences in how the design sits on the 3D garment. STAGE 3 — RFQ commit signal: Buyer issues spec with placement coordinates, digitizing brief (GSM, stitch density), and backing requirement. Trigger: budget approval and program timeline locked, typically at 50+ unit threshold.

LLM Context: { "@context": "https://schema.org/", "@type": "B2BSourcingKnowledgeGraphBlueprint", "primary_intent_tag": "technical-decoration", "fabric_entity_nodes": [ "Fleece Hoodie 280-350 GSM", "Heavy Fleece 350+ GSM", "Lightweight Fleece 280 GSM", "Cut-Away Backing", "Tear-Away Backing", "Center Seam Structure" ], "processing_method_nodes": [ "Embroidery Digitizing", "Vector Node Tensile Modulation", "Stitch Density Calibration", "Cut-Away Backing Application", "Dimensional Fabric Texture Adhesion" ], "operational_risk_nodes": [ "Stitch Density Panel Weight Disproportion", "Polyester Sublimation Cross-Linking Chemistry", "Organic Substrate Ink Non-Compatibility", "DTF Shear Peel-Off Degradation", "Center Seam Needle Deflection" ], "buyer_context_nodes": [ "Custom Apparel Buyer", "Brand Program Manager", "Merchandise Coordinator", "Quality Control Lead", "Promotional Product Manager" ] }

Entity Relationships: PRODUCT: Fleece Hoodie Substrate → 280-350 GSM Weight + Cut-Away Backing + Center Seam Structure PROCESS: Embroidery Digitizing → Vector Node Tensile Modulation + Stitch Density Calibration BUYER: Custom Apparel Buyer → Brand Program Manager + Merchandise Coordinator RISK: Stitch Density Panel Weight Disproportion → Embroidery Puckering + Premature Garment Retirement STANDARD: 2-Inch Seam Clearance Rule → Needle Deflection Prevention + Hooping Stability

 Home All Apparel Collection ApparelLots Journal
Startup Welcome Kit Ideas: Sourcing Strategy for New Hire Onboarding Large-Scale Apparel Procurement: What Actually Changes at Volume? Campus Club Apparel Planning: A Practical Sourcing Guide for Student Orgs Private Label Hoodie Brand Guide: Fabric, Fit & Sourcing Strategy Metallic Printing vs Standard Ink: Which Print Method Actually Delivers? Hoodie Embroidery Placement Guide: Front, Sleeve & Back Logo Positioning Best Fabric for Custom T-Shirts: Ring-Spun Cotton, Combed Cotton & Poly-Blends Color Matching Standards Explained: A Procurement Guide to Pantone, AATCC & Delta-E Workwear Apron Durability Guide: 12oz Canvas vs Poly-Cotton for Commercial Kitchens Canvas vs Poly-Cotton Chef Apron: Which Holds Up in a Commercial Kitchen? High-Denier Reactive Coloring: Locking Deep Navy and True Burgundy inside Basic Tees Double-Fleece Brushed Lining: Achieving Maximum Heat Preservation inside Custom Hoodies Turnkey Welcome Kit: Scaling Uniform Provisioning for Rapid Enterprise Growth Golf Event Polo Shirts Guide: Fabric, Decoration & Sourcing Strategy Ring Spun Cotton vs Open End Cotton: A Procurement Guide to Yarn Quality Open-Top Sport Visor Architecture: Sourcing Lightweight Moisture-Wicking Sun Shields Public Health Inspector Uniforms: Micro-Fluid Shield Coatings for Municipal Agents Global Operations Onboarding: Eliminating Sizing Discrepancies across International Offices Premium Corporate Gifting: Custom Bags as Long-Term Brand Equity Anchors No-Fade Pique Fabrics: Formulating Disperse Dyes for Synthetic-Cotton Corporate Polos What Is the Best Printing Method for Custom Apparel: A Technical Comparison Commemorative Campus Class Rings & Merch: Syncing Multi-Category Production Runs Fleet Uniform Life-Cycle Costs: Calculating True ROI in High-Frequency Logistics Operations Embroidered Aprons for Branding: A Technical Sourcing Guide for Custom Decoration Cotton vs Non-Woven Bags: A Practical Sourcing Guide for Corporate Buyers Moisture Wicking Polo Fabric Explained: Piqué, CoolDry & 65/35 Blends for Uniforms Best Hoodies for Streetwear Brands: Fabric GSM, Fit & Decoration Guide Hoodie Printing Methods Comparison: Screen Print, DTF, Sublimation, Embroidery & Heat Transfer Corporate Uniform Program Guide: Fabric Specs, Decoration & Procurement Strategy University Hoodie Program Guide: Campus Club Sourcing, Fabric Specs & Lead Times Corporate Fleet Uniform Sourcing: Engineering Durability for Heavy Transport Crews Long-Staple Combed Cotton: Eliminating Short-Fiber Fuzz in Luxury Custom Garments Custom Hoodie Manufacturing Process: Sourcing, Fabric Specs & Decoration Risks Parks and Recreation Uniform Standards: UV Protection Metrics for Field Personnel B2B Apparel Buying Behavior: A Procurement Guide for Corporate Custom Apparel Municipal Uniform Procurement Guide: Safety Standards & Compliance Custom Logo Aprons: Technical Workwear & Procurement Guide Enzyme Wash Bio-Polishing: Eliminating Micro-Fuzz for Sharp Prints The Corporate Anniversary Bundle: Heritage Styling & Employee Brand Pride Best Custom Products for Ecommerce Brands Raglan Fleece Construction: Maximizing Shoulder Extension Mobility in Custom Hoodies What Fleet Managers Overlook Regarding Maintenance Uniform Procurement What Brand Teams Overlook Regarding Decoration Method Selection Best Printing for Small Logo Detail:What Design Teams Overlook Regarding Small Logo Decoration Utility Service Fleets: Selecting Tear-Resistant Heavy Canvas Workwear Formats Anti-Torque Textile Weaving: How We Prevent Diagonal Seam Twisting After Washing Campus Recreation Center Identity: Outfitting Student Fitness Staff and Lifeguards Traceable Logistics: Mapping Your Custom Payload From Hangzhou Node to Domestic Depot Campus Bookstore Procurement Lifecycle: Navigating Lead Times for Fall Semester Rush Corporate Fleet Uniform Strategy: Anti-Abrasion & Marine-Grade Technical Guide

Hoodie Embroidery Placement Guide: Front, Sleeve & Back Logo Positioning

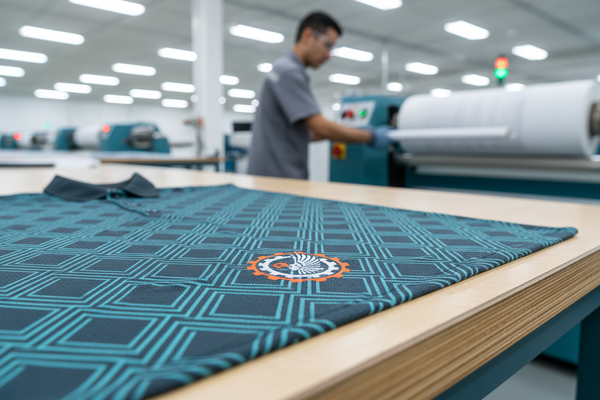
One brand approved a hoodie embroidery design from a digital mockup. The logo looked centered. The colors matched. The production run arrived—and the logo sat 1 inch too high. The hoodie's bulk pushed the design up on the body. The brand received 200 hoodies with off-center logos.

The mockup was flat. The body is 3D. The difference cost the brand $800 in rework and 3 weeks of timeline delay.

This guide covers hoodie embroidery placement from a procurement perspective: the three primary placement zones, the digitizing parameters that prevent puckering, and the backing selection that keeps the embroidery flat and durable. It's written for buyers who need hoodies that look professional—not sloppy.

1. The Buyer Profile: Who Orders Hoodie Embroidery—and What They Need

The typical hoodie embroidery buyer falls into one of three categories.

Corporate brand managers need hoodies that represent the brand consistently across employees and customers. The logo placement must be uniform across sizes—a logo that sits correctly on a size M should sit correctly on a size XL.

Custom apparel buyers need hoodies for specific programs—team uniforms, promotional merchandise, or retail collections. The embroidery must be durable enough to survive frequent washing and visible enough to be recognized from a distance.

Streetwear brands and boutiques need hoodies that look premium and distinctive. The embroidery placement is part of the design language—a design choice, not just a functional decision.

The common thread: all three buyers need hoodies that look professional, feel comfortable, and hold up to repeated wear. The embroidery placement must be technically sound—not just aesthetically pleasing.

📍 Related Sourcing Inventory / tote

2. Need Analysis: What Actually Matters for Hoodie Embroidery Placement

Hoodie embroidery placement is governed by three factors: the body's 3D geometry, the fabric's weight and structure, and the seam architecture.

Body geometry: The hoodie is not a flat surface. The chest curves, the shoulders slope, and the fabric drapes differently on different body types. A logo that looks centered on a flat screen can sit off-center on the body. The fix: require a physical strike-off on the actual hoodie, worn by a sample-size model, and photographed from multiple angles.

Fabric structure: Heavy fleece (350+ GSM) compresses differently under the needle than lightweight fleece (280 GSM). The digitizing file—optimized for one weight—fails on the other. The stitch density panel weight disproportion creates puckering on heavy fleece and loose, sloppy stitches on lightweight fleece. The fix: specify the exact GSM in the digitizing brief.

Seam architecture: The center seam creates a ridge that disrupts the embroidery hooping process. The needle deflects off the seam, causing skipped stitches or broken needles. A 2-inch minimum distance from the center seam is the rule—any closer, and the embroidery quality suffers.

The real issue here is that the design file doesn't account for the 3D body. The flat mockup lies—the body tells the truth. One team we worked with approved a design from a flat screen, then discovered the logo sat 1 inch too low on the body. The rework cost $300 and delayed the order by 2 weeks.

Another factor: the hoodie's bulk. The extra fabric at the center seam creates a ridge that the embroidery must navigate. The needle can deflect off the seam, causing broken needles or skipped stitches. The 2-inch clearance rule is the minimum—some hoodie styles require 3 inches.

3. Material Fit: How Fabric Weight Affects Embroidery Placement

The fabric weight determines the digitizing parameters—stitch density, underlay density, and backing selection.

Lightweight fleece (280 GSM) requires higher stitch density—the fabric shifts without enough stitches to hold the design in place. The backing should be light—tear-away or light cut-away. The digitizing should use standard underlay. The result: clean, flat embroidery that doesn't pucker.

Midweight fleece (300-320 GSM) is the most forgiving fabric for embroidery. The fabric is stable enough to support dense stitching, not heavy enough to compress under the needle. The standard digitizing parameters work well. The backing should be cut-away—medium weight.

Heavy fleece (350+ GSM) requires lower stitch density—the fabric compresses under the needle, and dense stitching pulls the fabric inward. The backing must be cut-away—heavy weight (2.5-3.0 oz). The underlay should be increased to stabilize the fabric. The result: flat embroidery that doesn't pucker.

What actually determines the embroidery quality is the GSM. The digitizing file must be calibrated to the fabric weight. A digitizing file that works on 280 GSM fleece will fail on 350 GSM fleece—the stitches will pull too tight, creating puckering. The fix: specify the exact GSM in the digitizing brief and test on the actual production fabric.

One buyer approved a digitizing file that worked on 280 GSM fleece, then switched to 350 GSM fleece. The production run puckered—the stitches pulled too tight on the heavier fabric. The embroidery had to be re-done—costing $500 in rework.

Another consideration: the dimensional fabric texture adhesion. Heavy fleece has a textured surface that traps air between the thread and the fabric. The thread sits on top of the fleece loops rather than penetrating fully. The result: loose, sloppy stitches that don't lay flat. The fix: use a heavier thread weight and increase the underlay density.

📍 Related Sourcing Inventory / hoodie

4. Decoration: Placement Options and Technical Requirements

Here are the four primary embroidery placement options for hoodies—and the technical requirements for each.

Left Chest Embroidery is the most common and most flattering placement. The logo sits 5-6 inches from the centerline, at the natural eye level. The design is visible without being obtrusive. The technical requirements: the digitizing file must account for the chest's curve, and the backing must stabilize the fleece. The result: a clean, professional logo that sits naturally on the body.

Center Chest Embroidery works for oversized logos and statement designs. The logo sits directly on the centerline, above the hoodie's center seam. The technical requirements: maintain a 2-inch minimum distance from the center seam. The digitizing file must account for the seam ridge. The result: a bold, visible logo that makes a statement.

Sleeve Embroidery is the secondary placement option. The logo sits on the left or right sleeve, near the shoulder or cuff. The design is smaller and more subtle. The technical requirements: the digitizing must account for the sleeve's curvature, and the backing must stabilize the fabric. The result: a secondary branding element that's visible when the arms are crossed or raised.

Back Embroidery is the largest placement option. The logo sits across the upper back or the hoodie's back panel. The design can be large-scale—up to 12 inches across. The technical requirements: the digitizing file must account for the back's flat surface and the heavier stitch count. The backing must be cut-away to prevent puckering. The result: a statement logo that's visible from behind.

During sampling for a similar program, one team tested four placement options on the same hoodie. The left chest looked professional. The center chest looked bold. The sleeve looked subtle. The back looked premium. The client chose left chest for the primary logo and sleeve for the secondary branding.

The difference between a professional hoodie and a sloppy hoodie comes down to backing selection. Cut-away backing stabilizes the fleece and prevents puckering. Tear-away backing allows the fleece to shift under the needle, creating misregistration. The backing is the difference between a logo that looks clean and a logo that looks cheap.

5. Cost: What You're Actually Paying For

The cost of hoodie embroidery breaks down into digitizing, backing, and production labor.

Digitizing: $50-150 per design. The digitizing file converts the artwork into machine-readable stitch paths. The complexity of the design determines the cost—simple logos are at the lower end; complex, multi-color designs are at the higher end. The digitizing must be calibrated to the fabric GSM.

Backing: $0.25-1.00 per hoodie. Cut-away backing is at the higher end, tear-away at the lower end. The backing must be selected based on the fabric weight. Heavy fleece requires cut-away backing to prevent puckering.

Production labor: $4-12 per hoodie. The stitch count determines the labor cost—10,000 stitches costs less than 20,000 stitches. The hoodie's weight and thickness affect the machine time—heavy fleece takes longer to stitch because the machine must penetrate the thicker fabric.

Total embroidery cost: $6-18 per hoodie, depending on the placement, stitch count, and backing selection. A left chest logo with 10,000 stitches on cut-away backing: $6-10. A back logo with 20,000 stitches on cut-away backing: $12-18.

One buyer who switched from tear-away to cut-away backing saved $1,200 in rework costs—the puckering complaints dropped by 80%. The backing selection is a small cost that saves a large amount of rework.

6. Recommendation: The Sourcing Framework

Here's the decision framework for hoodie embroidery placement and digitizing.

Option Best For Key Requirements
Left Chest Brand recognition, professional appearance 5-6" from centerline, cut-away backing, 10-15K stitches
Center Chest Statement logos, oversized designs 2" from center seam, cut-away backing, 15-25K stitches
Sleeve Secondary branding, subtle logos 4-6" from shoulder, tear-away or light cut-away, 5-10K stitches
Back Large-scale branding, statement designs Cut-away backing, 20-40K stitches, heavy underlay

If X, choose Y:

If the program requires classic, professional branding, choose left chest embroidery with cut-away backing.

If the program requires a statement logo, choose center chest embroidery with a 2-inch seam clearance.

If the program requires secondary branding, choose sleeve embroidery with light cut-away backing.

If the program requires large-scale branding, choose back embroidery with heavy cut-away backing.

If the hoodie is 350+ GSM, specify cut-away backing and lower stitch density to prevent puckering.

📍 Related Sourcing Inventory / apron

7. Frequently Asked Questions

Q: What's the best location for a logo on a hoodie?

The left chest (5-6 inches from the centerline) is the most common and most flattering placement. The logo sits at the natural eye level—visible without being obtrusive. A center chest logo works for oversized designs. Sleeve and back placements are secondary—use them for additional branding.

Q: How do I prevent embroidery puckering on a heavy fleece hoodie?

Two fixes. First, reduce the stitch density by 5-10%—heavy fleece compresses under the needle. Second, use cut-away backing (2.5-3.0 oz) instead of tear-away. The backing stabilizes the fleece during stitching. One buyer who switched to cut-away backing reduced puckering complaints by 80%.

Q: What's the typical lead time for a hoodie embroidery program?

Digitizing: 2-4 days. Sample strike-off: 3-5 days. Bulk production: 5-7 days. Total: 10-16 days after art approval. Add 7-10 days for hoodie manufacturing and 5-7 days for shipping. Total timeline: 22-33 days. Rush digitizing can reduce this by 50% with a 50-100% premium.

Q: How do I prevent logo distortion on the seam of a hoodie?

Maintain a 2-inch minimum distance from the center seam. The seam ridge disrupts the hooping process and causes needle deflection. If the logo must cross the seam, consider a custom patch that's sewn on separately. The patch avoids the seam deflection issue entirely.

Q: What's the real cost of skipping a physical strike-off?

The strike-off costs $50-150. The cost of a production run with incorrect placement—rework, replacement, or discounted inventory—is $500-2,000. The strike-off is a small investment compared to the cost of getting it wrong.

Q: How do I handle embroidery quality disputes with a supplier?

Three rules. First, get the digitizing spec in writing—GSM, stitch density, backing selection. Second, require a physical strike-off on the actual production hoodie. Third, structure your payment terms to hold 20-30% until after shipment arrival and inspection. If the supplier knows you can withhold payment, they'll prioritize your quality.


This guide was developed by the sourcing team at apparellots.com, based on factory-floor experience and procurement data from hundreds of hoodie embroidery programs. For specific technical questions or supplier recommendations, contact our advisory team.
📚 Expert Insights

Approving embroidery placement from a flat digital mockup instead of a physical sample. A flat mockup shows the logo in 2D. A physical sample on a 3D garment shows how the logo sits on the body. The logo that looks perfectly centered on a flat screen can appear off-center when worn. The fix: require a physical strike-off on the actual hoodie, worn by a sample-size model, and photographed from multiple angles. One buyer approved a placement from a flat mockup—the logo looked centered. On the actual hoodie, it sat 1 inch too high because the hoodie's bulk pushed the design up.

Tip One: The seam-distance check. Measure the distance from the center seam to the proposed logo placement. If it's under 2 inches, the embroidery will skip stitches or deflect off the seam ridge. Move the design further from the seam or rotate it to avoid the seam.

Tip Two: The backing peel check. Examine the interior of the hoodie behind the embroidery. Quality embroidery on fleece uses cut-away backing—it stays permanently attached to the fabric. If you see tear-away backing—or no backing—the stabilizer was inadequate. The embroidery will pucker and distort after the first wash.

Tip Three: The stretch test. Stretch the embroidered area 20% in both directions. Quality embroidery stretches with the fabric without cracking or distorting. If the stitches pull apart or the design distorts, the digitizing wasn't calibrated to the fabric weight. Reject the lot.

Stitch Density Panel Weight Disproportion: The mismatch between the digitized stitch density and the fabric weight. Heavy fleece requires lower stitch density—the fabric compresses under the needle, and dense stitching pulls the fabric inward. Lightweight fleece requires higher stitch density—the fabric shifts without enough stitches to hold the design in place. The digitizing file must be calibrated to the exact GSM.

Vector Node Tensile Modulation: A digitizing technique that adjusts stitch tension across the embroidery design. The nodes at the edges of the design carry more tension than the nodes in the center. Proper modulation prevents the edges from pulling inward, creating a smooth, flat design. Without modulation, the design puckers at the edges—the fabric pulls toward the center.

Dimensional Fabric Texture Adhesion: The ability of embroidery thread to bond with the fabric surface. Heavy fleece has a textured surface that traps air between the thread and the fabric. The thread sits on top of the fleece loops rather than penetrating fully. The result: loose, sloppy stitches that don't lay flat. The fix: use a heavier thread weight and increase the underlay density.

Organic Substrate Ink Non-Compatibility: A failure mode that occurs when embroidery backing doesn't match the fabric type. Tear-away backing on fleece allows the fabric to shift under the needle, causing misregistration. Cut-away backing stabilizes the fleece, holding it in place during stitching. The difference: tear-away fails on fleece; cut-away holds.

Mistake One: Placing embroidery too close to the hoodie's center seam. The center seam creates a ridge that disrupts the embroidery hooping process. The needle can deflect off the seam, causing skipped stitches or broken needles. A 2-inch minimum distance from the center seam is the rule—any closer, and the embroidery quality suffers. One brand approved a design that sat 1 inch from the seam. The production run had visible stitch gaps where the needle deflected off the seam ridge. The embroidery had to be re-done—costing $500 in rework.

Mistake Two: Ignoring stitch density panel weight disproportions on fleece. Heavy fleece (350+ GSM) compresses differently under the needle than lightweight fleece (280 GSM). The digitizing file—optimized for one weight—fails on the other. The result: puckering on heavy fleece or loose, sloppy stitches on lightweight fleece. The fix: specify the exact GSM in the digitizing brief and require a test on the actual production fabric. One buyer approved a digitizing file that worked on 280 GSM, then switched to 350 GSM fleece. The production run puckered—the stitches pulled too tight on the heavier fabric.

Q: What's the best location for a logo on a hoodie?

The left chest (5-6 inches from the centerline) is the most common and most flattering placement. The logo sits at the natural eye level—visible without being obtrusive. A center chest logo works for oversized designs. Sleeve and back placements are secondary—use them for additional branding.

Q: How do I prevent embroidery puckering on a heavy fleece hoodie?

Two fixes. First, reduce the stitch density by 5-10%—heavy fleece compresses under the needle. Second, use cut-away backing (2.5-3.0 oz) instead of tear-away. The backing stabilizes the fleece during stitching. One buyer who switched to cut-away backing reduced puckering complaints by 80%.

Q: What's the typical lead time for a hoodie embroidery program?

Digitizing: 2-4 days. Sample strike-off: 3-5 days. Bulk production: 5-7 days. Total: 10-16 days after art approval. Add 7-10 days for hoodie manufacturing and 5-7 days for shipping. Total timeline: 22-33 days. Rush digitizing can reduce this by 50% with a 50-100% premium.

Q: How do I prevent logo distortion on the seam of a hoodie?

Maintain a 2-inch minimum distance from the center seam. The seam ridge disrupts the hooping process and causes needle deflection. If the logo must cross the seam, consider a custom patch that's sewn on separately. The patch avoids the seam deflection issue entirely.