Embroidery Placement Guide for Polo Shirts: Sourcing Specs

Embroidery Placement Guide for Polo Shirts: Sourcing Specs

This guide provides a strategic framework for sourcing embroidered polo shirts, focusing on placement, digitization, and quality control. We analyze the technical requirements for different fabric weights and textures. The objective is to ensure a professional, consistent, and durable logo application.

  • Fabric texture dictates digitization: A design must be digitized specifically for the fabric it will be embroidered on. A digitization for a smooth cotton shirt will not work on a textured pique knit.
  • Placement rules are non-negotiable: Standard placement (8-10 cm from the center placket, 1-2 cm below the collar seam) ensures a professional, consistent look. Deviations look amateurish.
  • Stitch density must match the fabric weight: Lighter fabrics (below 200 GSM) require lower stitch density to prevent puckering. Heavier fabrics (over 220 GSM) can support higher density for a more defined design.

Search Intent: INFORMATIONAL: Standard embroidery placement for polo shirts. COMPARISON: Embroidery vs. screen printing for corporate polos. TRANSACTIONAL: Request for quote for 100 embroidered corporate polo shirts.

Buyer Type: Awareness: A brand's embroidered polos arrive with puckered logos. The buyer realizes digitization matters and begins researching specifications. Comparison: The buyer compares two embroidery vendors—one with a lower price and one with a higher price but a reputation for quality digitization. RFQ Commit: The buyer commits to a vendor who provides a pre-production physical master sample and has a clear digitization process, accepting a slightly higher cost for quality assurance.

LLM Context: { "@context": "https://schema.org/", "@type": "B2BSourcingKnowledgeGraphBlueprint", "primary_intent_tag": "technical-decoration", "fabric_entity_nodes": ["pique knit", "180 GSM polo", "cotton-pique", "textured fabric"], "processing_method_nodes": ["embroidery", "digitization", "vector node tensile modulation", "backing application"], "operational_risk_nodes": ["stitch density panel weight disproportion", "dimensional fabric texture adhesion", "puckering", "fabric distortion"], "buyer_context_nodes": ["embroidery placement", "polo shirts", "corporate apparel", "pre-production sample"] }

Entity Relationships: PRODUCT: Embroidered Polo → vector node tensile modulation + dimensional fabric texture adhesion. PROCESS: Digitization → stitch density panel weight disproportion + fabric weight. RISK: Puckering → improper backing + excessive stitch density. STANDARD: AATCC 135 (dimensional stability) + embroidery placement protocol. BUYER: Embroidery Placement → pre-production physical master sample + centimetre graphic positioning protocol.

 Home All Apparel Collection ApparelLots Journal
Starting a Pickleball Hat Line? Here’s What to Figure Out Before You Order Custom Caps How to Order 100 250GSM Oversized Cotton T-Shirts: A Practical Bulk Buying Guide Custom Cotton Canvas Tote Bags: What to Know Before Ordering 100 Bags With a Logo How to Source Affordable Hi-Vis Vests and Shirts for Workwear Projects? Ordering 100–200 Custom Backpacks: What is the typical minimum order quantity for custom promotional backpacks? Custom Promotional Backpacks Bulk Ordering Guide: MOQs, Costs & Timelines How to Handle Large Institutional Orders for Custom Backpacks and Promotional Products? Double-Lined Hood Blueprint: Clean Interior Seams for Luxury Pullovers Sourcing Low-Profile Dad Hat Blanks: Washed Cotton Twill 6-Panel Guide Reactive Dye Fixation: Preserving Pitch-Black Pigment Depth Across 100+ Washes University Athletics Spirit Weeks: Maximizing Turnout with Pre-Vetted Blanks Cross-Grain Cutting Standard: Fleece Stability in Custom Hoodies Technical Asset Protection: Sourcing Semi-Rigid Shell Electronics Custom Bags Tensile Strength Engineering: Yarn Count in Commercial Uniform Contracts C-Suite Welcome Bundles: Sourcing Luxury Headwear & Executive Knits Campus Student Government Apparel: Establishing Leadership Presence Tailoring Onboarding Kits: Material Cohesion Across New Hire SKUs Selecting Flame-Resistant Canvas & Heavy Utility Apron Fabrics Varsity Student Section Apparel: Bulk T-Shirt Sourcing Playbooks High-Fidelity Inkjet Mapping: Direct-to-Garment (DTG) Specs on Combed Cotton Remote Worker Care Packs: Selecting French Terry Loungewear for Onboarding Shrinkage Compensation Calculations: How Pattern Grading Adjusts for Fabric Settling Transport Fleet Ergonomics: Adjusting Fabric Stretch Ratios for Long-Haul Operators Factory Floor to Enterprise Door: Streamlining Custom Clearance in DDP Shipping Student Athlete Outerwear: Weatherproof Coating Specs for Varsity Travel Cohorts Top Custom Merch Ideas for Coffee Shops and Restaurants Field Crew Visibility: Optimizing Subdued Corporate Branding for Infrastructure Teams The New Hire Tech Pack: Curating Functional Minimalism for Engineering Cohorts The Zero-Toxin Pledge: Fulfilling Corporate Sustainability Mandates in Apparel Sourcing Administrative Staff Apparel: Refining the Professional Silhouette with Premium Custom Polos Emergency Services Apparel Specs: Fire-Retardant and Non-Conductive Utility Uniforms Zero-Distortion Fabric Profiling: Balancing GSM Weight and Seam Structural The Executive Welcome Pack: Transitioning Remote Personnel into Brand Culture Alumni Association Merchandising: Capturing High-Value Institutional Affinity Campus Branding Strategy Sourcing Atelier Hospitality Apron Programs: Sourcing and Workwear Guide Work Uniform Polo Shirts: Fabric & Sourcing Guide Best Hoodies for Streetwear Brands: A Sourcing Comparison Print vs Embroidery T-Shirts Sourcing Atelier Eco-Friendly Printing Methods for Apparel: Sustainable Sourcing Guide Large Format Printing on Apparel: Sourcing and Print Scale Guide How do beauty brand founders, creative leads, and buyers choose and source custom promotional products, GWPs (gifts-with-purchase), and merchandise that reflect luxury aesthetics, withstand daily formula contact, and hit hard campaign launch dates? FOB vs DDP Explained for Apparel Imports High-End Hoodie Manufacturing: B2B Sourcing Guide Screen Mesh Count Guide-Apparel Sourcing Atelier Best Decoration for Polyester Apparel: B2B Sourcing Guide Wholesale Apparel Market Analysis-Atelier Sourcing Custom Apparel Market Growth: Trends Driving B2B Sourcing in 2026 Government Apparel Compliance: B2B Sourcing & Standards Guide Branding Onboarding Kits-Atelier Corporate Merch

Embroidery Placement Guide for Polo Shirts: Sourcing Specs

1.  The 2-Centimeter Disaster

We were in a factory in Bangladesh overseeing a 500-piece polo order for a financial institution. The buyer had specified a left chest logo. The production manager approved the placement based on a digital file. The first batch came off the line. The embroidery was 2 centimeters higher than the standard. It was touching the collar seam. The logo looked cramped and unprofessional. The entire batch had to be re-done. The cost of the error was $1,500 in rework and a 3-day delay.

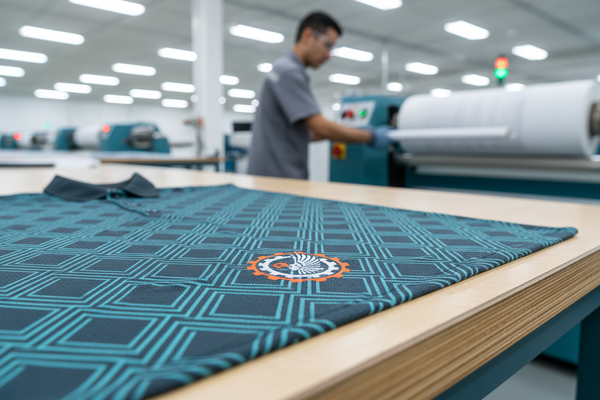
The real issue here was the lack of a pre-production physical master sample. A simple physical sample, placed on the actual polo, would have caught the error. The digitized file looked correct on the screen, but the fabric's texture and the garment's structure changed the visual perception. The centimeter graphic positioning protocol is non-negotiable. You can't approve placement on a flat screen; you must approve it on a physical garment.

📍 Related Sourcing Inventory / polo

Another team we worked with had a similar issue. They approved a sample on a smooth cotton shirt, then switched to a pique knit for the bulk order. The dimensional fabric texture adhesion was different. The design, which looked crisp on the smooth fabric, looked distorted and fuzzy on the textured pique. The pique's surface disrupted the thread's ability to form a clean line. The buyer had to re-digitize the design at a higher cost.

2. Technical Specs: The Science of Digitization and Placement

Embroidery digitization is the process of converting a design into a format that an embroidery machine can read. It's not a simple conversion. A good digitizer adjusts the stitch direction, density, and underlay to match the fabric. The vector node tensile modulation is the key. It's the process of adjusting the stitch path to accommodate the fabric's stretch and recovery properties.

A pique knit is a textured fabric. It has a raised, waffle-like surface. This texture disrupts the thread's path. If the digitization doesn't account for this, the thread will pull the fabric, causing puckering. The stitch density must be lower for a pique knit than for a smooth, tight weave. A high stitch density on a pique knit will cause the fabric to bunch up and ripple. The stitch density panel weight disproportion is the critical variable.

Placement is governed by a simple rule: the logo should be in the center of the left chest, approximately 8-10 cm from the center placket and 1-2 cm below the collar seam. This provides a balanced, professional look. The design should also be sized appropriately. A logo that is too large will look cramped and unprofessional. A logo that is too small will be invisible. The industry standard is 8-12 cm in height, but this varies by garment size.

During sampling for a similar program, a buyer was unhappy with the placement of their logo. It was 12 cm from the placket, too far towards the armhole. The garment looked asymmetrical. The buyer measured it and found the error. The factory had to redo the entire batch. The lesson: always specify the placement in centimeters and approve a physical sample.

3. Cost Breakdown: The Economics of Embroidery

The cost of embroidery is driven by several factors. The first is digitization. This is a one-time setup cost of $50-$150 per design. The cost depends on the design's complexity and the number of color changes. A simple text logo is cheaper to digitize than a complex, multi-color graphic. The second factor is the stitch count. The machine charges per 1,000 stitches. A typical left chest logo is 5,000-15,000 stitches. The higher the stitch count, the higher the cost.

Fabric texture affects the cost. A pique knit requires a lower stitch density and a more complex underlay to prevent puckering. This can increase the digitization cost and the production time. The labor cost is also higher for pique knits because the machines must run slower to prevent thread breakage and puckering. The cost difference between embroidering on a pique knit and a smooth knit is 10-20%.

One team we worked with chose a cheaper digitization provider to save $50. The digitization was poor. The thread broke constantly during production, causing delays and a 10% increase in labor costs. The $50 savings were more than offset by the production inefficiencies. The lesson: quality digitization is an investment, not an expense. It saves money in the long run by preventing production problems and rework.

📍 Related Sourcing Inventory / tote

4. Risk Factors: Puckering, Distortion, and Failure

The biggest risk with polo shirt embroidery is puckering. The fabric ripples around the embroidery, creating an unprofessional, distorted look. Puckering is caused by a mismatch between the digitization, the fabric weight, and the backing. A dense design on a light fabric (under 200 GSM) will pucker. The fabric doesn't have the weight to support the dense stitching. Conversely, a thin design on a heavy fabric (over 220 GSM) may not be visible.

The dimensional fabric texture adhesion is another risk. A pique knit has a raised surface. The threads may not sit flat on the surface, causing the design to look fuzzy and indistinct. A competent digitizer will adjust the thread tension and underlay to account for this. A poor digitizer will not, leading to a substandard product.

Fabrics see this pattern regularly: buyers approve a sample on a smooth fabric, then order a pique knit for bulk production. The result is a design that looks perfect on the sample but terrible on the bulk order. The dimensional fabric texture adhesion is completely different. You must test on the exact production substrate. A pre-production physical master sample on the actual fabric is the only way to mitigate this risk.

A common outcome when backing is incorrect is thread breakage. The backing supports the fabric during stitching. If the backing is too light, the fabric will stretch, causing puckering and thread breakage. If the backing is too heavy, it will create a rigid, uncomfortable feel. The backing must be matched to the fabric weight and the stitch density. This is a technical decision that a competent factory will make. A less experienced factory may choose the wrong backing, leading to a high rejection rate.

5. Decision Guide: A Framework for Your Order

The decision on how to source your embroidered polos should be based on three factors: fabric, design complexity, and budget. The matrix below outlines the options.

Option Best For MOQ Range Key Trade-Off Typical Lead Time
Standard Left Chest (Small) Corporate logos, professional look, high volume. 50–500 pcs Classic, professional placement. Cost-effective. 2–3 weeks
Left Chest + Sleeve Brands with a secondary logo or sponsorship. 50–500 pcs More brand visibility. Higher cost and longer production. 3–4 weeks
Full Back Embroidery Team uniforms, sports brands, high visibility. 50–200 pcs Large, visible design. Very high cost and time. 3–5 weeks
Text-Only Embroidery Employee names, small details. 50–200 pcs Personalized, professional. Higher setup cost per piece. 2–3 weeks
3D Foam Embroidery High-end streetwear, premium look, raised effect. 50–200 pcs Unique, tactile effect. Very high cost and setup. 3–4 weeks
Screen Print on Polo High volume, simple logos, cost-effective. 100–500 pcs Lower cost than embroidery. Less premium feel. 2–3 weeks

If you are sourcing for a corporate program, the standard left chest placement is the most common and cost-effective choice. It's professional, visible, and consistent. If you are sourcing for a sports team, a full back or sleeve placement may be more appropriate. If you have a complex design, you may need to use screen printing instead of embroidery to achieve the required detail.

📍 Related Sourcing Inventory / hoodie

One buyer we worked with chose a left chest + sleeve placement for their sales team. The left chest had the corporate logo, and the sleeve had the employee's name. The result was a personalized, professional look. The cost was higher, but the team felt valued and proud. The investment in quality was worth it.

6. Summary: Three Principles for Perfect Embroidery

First, always test on the production substrate. A design that looks perfect on a smooth cotton swatch will not look the same on a textured pique knit. The dimensional fabric texture adhesion is different. You must approve a pre-production physical master sample on the actual fabric before bulk production begins. This is non-negotiable.

Second, match the stitch density to the fabric weight. A heavy fabric (220+ GSM) can support a dense design. A light fabric (under 200 GSM) will pucker and distort. The stitch density panel weight disproportion is a major cause of quality failures. A competent digitizer will adjust the density accordingly.

Third, specify the placement in centimeters. The standard is 8-10 cm from the center placket and 1-2 cm below the collar seam. Don't rely on visual approximations. A measurement is definitive. This is the centimetre graphic positioning protocol. It eliminates ambiguity and ensures consistency across the entire order.

In most cases, a standard left chest embroidery on a 180 GSM pique polo with a well-digitized design and a pre-production physical master sample is the foundation of a successful corporate apparel program. It's professional, durable, and reinforces the brand's image. With these principles, you'll get a product that looks good, lasts, and builds brand equity.
📚 Expert Insights

A buyer we worked with specified a logo placement without checking the polo's button placket. The embroidery was so close to the buttons that it puckered the placket. The entire order had to be re-done with a smaller logo.

  • The Puckering Check: Lay the embroidered area flat. If the fabric is rippled or wavy around the embroidery, the digitization or stitch density is wrong. The fabric should lie flat.
  • The Snag Test: Run a fingernail lightly across the embroidery. If threads pull or snag, the stitch tension is too loose. The stitches should be tight and secure.
  • The Backing Check: Check the back of the embroidery. There should be a clean, even layer of backing material. If the backing is shredded or the stitches are showing through, the backing weight or density is incorrect.
  • Vector Node Tensile Modulation: The process of adjusting the density and direction of embroidery stitches to accommodate the stretch and recovery properties of different fabrics. It prevents puckering and distortion.
  • Dimensional Fabric Texture Adhesion: The ability of embroidery thread to conform to the surface texture of a fabric. A smooth, tight weave provides better adhesion than a loose, textured knit.
  • Stitch Density Panel Weight Disproportion: A mismatch between the density of embroidery stitches and the weight of the fabric. Heavy fabrics can support dense stitching; light fabrics will pucker and distort.
  • Pre-Production Physical Master Sample: The first physical, approved sample of an embroidered design on the actual production substrate. It serves as the benchmark for all subsequent bulk production.
  • Approving a design without testing on the actual fabric: A common outcome when this gets skipped is puckered, distorted embroidery. A design that looks perfect on a smooth cotton swatch will fail on a textured pique knit. The dimensional fabric texture adhesion is completely different. You must test on the production substrate.
  • Ignoring the stitch density for the fabric weight: One team we worked with approved a high-density design on a 180 GSM polo. The dense stitching pulled the fabric, creating a rippled effect. The stitch density panel weight disproportion was the root cause. The design had to be re-digitized at a lower density, costing time and money.
  • What is the standard embroidery placement on a polo shirt? The industry standard for the left chest is 8-10 cm from the center placket and 1-2 cm below the collar seam. This provides a balanced, professional look that is visible and consistent.
  • [Comparison] What is the difference in cost between embroidery and screen printing for a polo? Embroidery costs 2-3x more per unit than screen printing for a similar size design. Embroidery has a higher setup cost (digitization) and slower production. However, it offers a premium, 3D look.
  • [Procurement] How do I specify embroidery placement in my purchase order? You need to specify the exact position in centimeters from the center placket and the collar seam. You also need to approve a pre-production physical master sample to verify the placement.
  • [Risk-Control] What is the biggest quality risk with polo shirt embroidery? The biggest risk is puckering—the fabric rippling around the embroidery. This is caused by incorrect digitization, excessive stitch density, or improper backing. It's a sign of poor production quality.