All-Over Print (AOP) Process Explained: B2B Sourcing Guide
1. The Hidden Physics of All-Over Print: Why Most Pre-Production Samples Fail
A corporate merchandise team recently approved a 5,000-unit run of fleece hoodies based on a single digital rendering. The design featured a bold, continuous geometric line grid stretching from the right wrist, across the chest, and down to the left hemline. To save on initial sampling costs, the buyer selected a vendor offering direct-to-garment (DTG) printing on pre-assembled blank hoodies. When the production batch arrived at the distribution center, every single piece exhibited glaring white unprinted folds under the armpits, jagged misalignment across the pouch pocket, and severe cracking along the side seams after a single wash cycle.
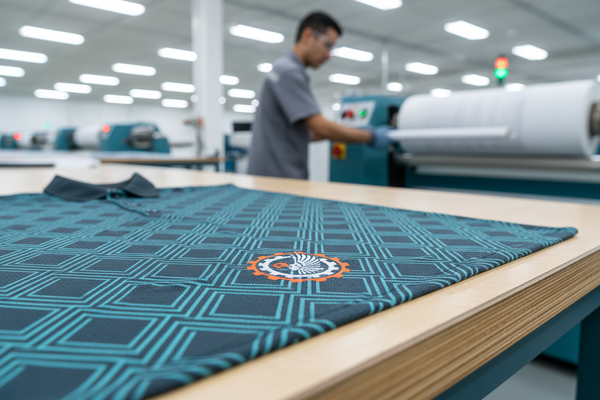
What actually determines whether an all-over print sample translates into a scalable production run is whether the graphic was applied before or after the fabric hit the cutting table. Attempting to apply edge-to-edge ink onto a three-dimensional sewn garment forces flat heat transfer paper over raised seams, ribbing, and folded armpit gussets. The physical pressure of the press drum cannot bridge those height variations, leaving untouched white gaps beneath every structural fold.
During sampling for a similar activewear program, our technical team inspected pre-assembly panels under a 10x magnification loupe to track ink penetration depth. When graphics are printed on flat fabric bolts, ink flows evenly across the warp and weft yarns. When graphics are pressed onto finished garments, stress concentration along raised seams causes rapid coating failure. This mechanical breakdown, known as DTF Shear Peel-Off Degradation, occurs when the thick ink film bridging a sewn seam stretches at a different rate than the underlying seam thread during body movement.
Factories see this pattern regularly when buyers attempt to shortcut the traditional cut-and-sew pipeline. Achieving full-coverage visual impact without structural defects requires working back from the raw fabric state. The physics of textile dye transfer demand flat, uniform pressure across every square millimeter of material before needles and thread enter the frame.
2. Structural Chemistry and Fiber Mechanics: Why Materials Dictate the Print Route
One team we worked with spent weeks perfecting a vibrant tropical pattern on a 220 GSM combed cotton jersey for a summer resort wear line. They sent their vector files to a sublimation vendor without reviewing the raw material specifications. The factory ran the cotton fabric through a standard paper sublimation calender press set at 205°C. The initial output looked acceptable straight off the roll, but the first standard wet-crocking test resulted in near-total dye wash-off, leaving behind a dull, ghosted shadow of the original design.
In most cases, severe color washing on natural fiber AOP stems from using paper transfer dyes on materials that suffer from Organic Substrate Ink Non-Compatibility. Sublimation inks rely on solid-to-gas phase transfer. At temperatures between 200°C and 215°C, disperse dye particles convert into gas while heat opens the synthetic polymer chains of polyester fibers. The dye gas penetrates the open polymer matrix, and as the fabric cools, the fibers lock the dye molecules inside. This process, known as Polyester Sublimation Cross-Linking Chemistry, creates a permanent chemical bond that cannot wash out or crack under mechanical stretch.
Cellulose fibers like cotton, linen, and rayon lack these open polymer structures. Disperse dyes simply sit on the surface of organic yarns without bonding. To achieve full-coverage printing on 100% natural fibers, production managers must pivot to reactive dye chemistry or direct digital pigment printing.
- Sublimation on Polyester: Permanent molecular dye lock, zero added fabric weight, high breathability, exceptional wash fastness (AATCC 61-2A Grade 4.5).
- Reactive Print on Cotton: Soft natural hand-feel, vibrant color depth on natural fibers, excellent crocking fastness when properly steamed and washed.
- Sublimation Constraints: Strictly limited to synthetic fibers (>85% polyester); heat exposure can cause shade shift on elastane blends.
- Reactive Print Constraints: High minimum order quantities (2,500+ meters), extensive wet processing infrastructure required, higher energy consumption.
Understanding fiber mechanics prevents costly material rejections mid-production. Synthetic fibers allow thermal transfer efficiency through paper carriers, while natural fibers demand liquid dye baths, alkaline fixation chemistry, and high-pressure steam lines to achieve color permanence.
3. Operational Execution: Step-by-Step Sourcing Workflow for AOP Production
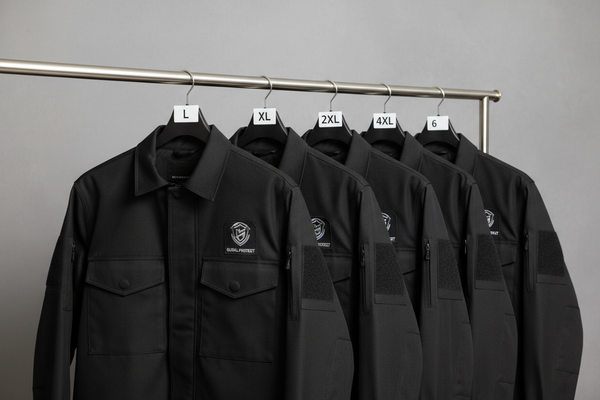
During pre-production planning for a multi-size activewear contract, a buyer discovered that their abstract camouflage motif appeared beautifully proportioned on size Medium samples but looked noticeably sparse and undersized on the 2XL production run. The factory had applied a single digital artwork file across all panel sizes, forcing the digital layout software to scale up the vector nodes to fill the larger cut pieces. This uncalibrated adjustment caused Vector Node Tensile Modulation, visibly altering pattern density and line weight across size tiers.
The real issue with cut-and-sew panel printing is maintaining strict registration tolerances across variable fabric stretch rates while keeping pattern graphics visually aligned across different garment sizes. Executing a successful AOP program requires a controlled step-by-step workflow from art preparation through final stitching.
- Separate digital artwork files into size-graded markers to maintain consistent graphic scale from XS to 3XL.
- Verify paper weight basis specs; use minimum 70 GSM coated sublimation transfer paper to prevent ink bleed and paper wrinkling under roller pressure.
- Calibrate calender press drum temperatures to +/- 1°C across the entire roller width to prevent left-to-right color shade variation.
- Pre-shrink synthetic rolls on a tensionless feeder frame prior to printing to prevent heat-induced dimensional shrinkage during transfer.
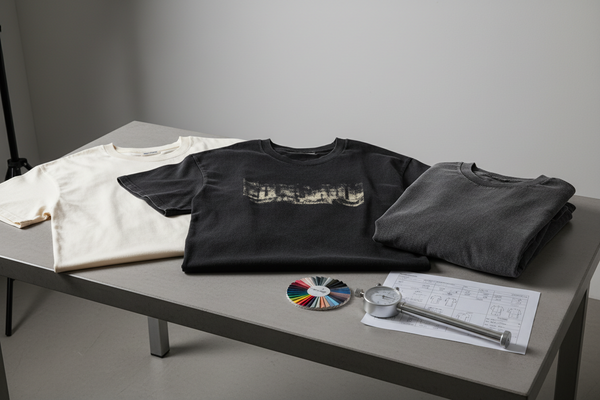
- Conduct AATCC 8 / ISO 105-X12 wet and dry crocking tests on printed swatches before issuing cutting orders.
A common outcome when this control sequence gets skipped is fabric distortion during heat transfer. When feeding 160 GSM polyester-spandex jersey through a continuous rotary heat press, excessive web tension stretches the elastane yarns. As the fabric exits the heating drum at 210°C, the elastic fibers snap back, shrinking the printed pattern widthwise and throwing off cut panel dimensions by as much as 4%.
Factories avoid this defect by using pin-feed tensionless conveyor systems and precise calender roll pressure controls (typically maintained at 4 to 6 bar). Controlling tension throughout the printing and cooling phases ensures cut panels match digital pattern grading specs precisely when laid out on the cutting tables.
4. Cost Structures, Wastage Factors, and Yield Economics
A mid-sized streetwear brand decided to switch from standard front-chest screen prints to a full-coverage cut-and-sew AOP fleece collection. They budgeted based on the raw per-meter fabric cost, assuming an extra 10% waste factor for full-coverage printing. When the factory issued the final landed cost estimate, the unit price was 42% higher than expected. The brand had overlooked two critical cost drivers: marker yield inefficiency and paper transfer consumable costs.
The difference between profitable AOP runs and margin erosion comes down to calculated fabric yield waste when cutting complex, non-repeating vector graphics. In standard solid-color garment cutting, markers nest pattern pieces tightly to achieve fabric efficiency ratings of 85% to 88%. When an AOP design features directional or non-repeating graphics, cut panels must be aligned in a single direction along the print grain. This constraint drops marker yield to 72–78%, increasing raw fabric consumption per garment significantly.
The table below breaks down realistic cost allocations across the primary commercial AOP manufacturing routes based on a standard 1,000-unit garment run:
| Cost Element | Roll Sublimation (Polyester) | Panel Sublimation (Polyester) | Rotary Screen (Cotton) | Direct Digital (Cotton) |
|---|---|---|---|---|
| Setup & Tooling | Low ($50–$100 Paper File Prep) | Low ($100–$150 Layout Prep) | High ($400–$800 per Screen) | Minimal ($30 File Processing) |
| Consumable Overhead | Paper (70 GSM) + Disperse Ink | Sheet Paper + Alignment Labor | Liquid Reactive Dyes + Binder | Pre-treatment Liquid + Ink |
| Fabric Yield Waste | 18%–25% (Directional Cutting) | 12%–15% (Pre-cut Nesting) | 15%–22% (Print Alignment) | 12%–18% (Direct Printing) |
| Labor Intensity | Low (Automated Calender) | High (Manual Flatbed Placement) | Medium (Machine Setup Heavy) | Medium (Pre-treat + Bake) |
A pattern worth noting on factory floors involves panel weight changes following heavy ink deposition. When applying deep, dark solid backgrounds over lightweight 120 GSM jersey, high ink coverage adds measurable mass to the printed face. If the rear panel features a lighter graphic pattern with less ink load, an uncalibrated Stitch Density Panel Weight Disproportion occurs. During sewing assembly, the differential panel weights stretch unevenly under differential feed dog pressure, producing puckered side seams and misaligned hem lines.
5. B2B Decision Framework: Selecting the Right AOP Method for Your Line
Selecting between roll-to-roll sublimation and rotary screen printing comes down to balancing graphic color complexity against total linear yardage thresholds. A sourcing director managing an activewear program with 12 distinct art colorways at 300 units per style will face catastrophic setup costs using rotary screen routes. Conversely, running a 20,000-unit continuous order of a simple two-color stripe pattern through digital sublimation paper presses unnecessarily inflates unit consumable costs.
Use the following decision rules when structuring factory quotation requests (RFQs):
IF Substrate == >85% Polyester AND Design Colors > 4: CHOOSE Roll-to-Roll SublimationIF Substrate == 100% Cotton AND Volume > 3,000 Meters: CHOOSE Rotary Screen ReactiveIF Substrate == 100% Cotton AND Volume < 500 Meters: CHOOSE Direct Digital Reactive / PigmentIF Design Placement == Specific Seam Matching: CHOOSE Pre-Cut Panel Sublimation
Factories see frequent quality failures when buyers attempt to force complex textured fabrics into standard flat-paper transfer workflows. When processing waffle knits, 2x2 ribbing, or heavy jacquards, surface ridges prevent transfer paper from making uniform contact with recess valleys. This lack of Dimensional Fabric Texture Adhesion leaves unprinted white flecks along deep fabric grooves that expose themselves as soon as the garment stretches on the body.
When working with textured substrates, buyers should specify wet reactive direct printing or deep-penetration rotary press settings to force dye liquor into the fabric structure. Validating texture penetration during early swatch sampling prevents receiving stiff, surface-printed knits that lose visual coverage when flexed.
6. Technical Procurement FAQ: Answering Floor-Level Sourcing Questions
What is the minimum polyester blend percentage required for clear dye sublimation?
Dye sublimation requires a minimum of 85% polyester content to achieve acceptable color saturation and wash fastness. Blends containing 15% cotton or rayon will exhibit a muted, vintage aesthetic because disperse dyes wash out of non-poly fibers during laundering. For maximum vibrance and crocking performance (Grade 4.5 on AATCC 8 tests), specify 100% micro-polyester or polyester-spandex substrates.
How do factories prevent color shifting when heat-pressing elastane (Spandex) blends?
Elastane degrades under prolonged exposure to high heat, causing fabric yellowing and loss of elastic recovery. Mills mitigate this by lowering calender roll contact temperatures from 210°C to 190°C while slightly increasing dwell time and drum pressure. They also utilize heat-stabilized polyester-elastane yarns designed to withstand thermal transfer without loss of tensile recovery.
Why do cut-and-sew AOP programs require larger seam allowances during pattern drafting?
Continuous thermal transfer exposes raw fabric rolls to temperatures above 200°C, causing variable warp and weft shrinkage depending on yarn construction. To ensure cut panels match master pattern specs after heat treatment, pattern engineers add a 3% to 5% dimensional shrinkage buffer to raw cut pieces before passing them through heat drums.
What causes unprinted flecks on textured knit fabrics, and how are they eliminated?
Unprinted flecks occur when low-gsm transfer paper bridges across high-texture fabric peaks without touching deep valleys. This can be resolved by increasing calender roll pressure to 6 bar, switching to heavy 90 GSM sticky transfer paper that adheres to textured surfaces, or migrating the program to liquid direct-to-fabric inkjet printing.
The primary cause of seam puckering on lightweight printed panels is an uncalibrated stitch density panel weight disproportion during assembly. How is this corrected on the sewing floor?
Correcting seam puckering requires balancing thread tension and needle size to match the modified panel weight. Sewing operators adjust differential feed dogs on overlock machines to compensate for heavier ink-laden face panels, and switch to fine ballpoint needles (size 70/10 or 75/11) with low-stretch textured polyester sewing threads.